Once you're done with theme installation, it's time to setup your blog. What to do next:
Demo Specific Settings
If you would like your setup to look like one of our demos but don't want the whole sample content, you can simply go to ContentBerg > Import Demos and import "Settings Only" for the demo of your choice. Once that's done, the demo settings will be available in ContentBerg > Customize.
By default, you will have free fonts installed . But if you have a paid TypeKit subscription, we recommend creating the TypeKit Kit with the font: FF More Pro (Normal and Bold).
To use TypeKit, refer to TypeKit Setup.
Setting up Navigation Menus works normally as it does for any WordPress Theme. If you're new to WordPress, you can learn more about menus in this article (external).
- Go to to Appearance > Menus.
- Click on the + button or the create a new menu link. Enter a menu name and click Create Menu.
- Using the Custom Links and Pages boxes at the left, add items to the menu and drag/drop to arrange them.
- If you would like to use this menu in navigation, in the "Manage Locations" area, under Main Navigation, select your newly
created menu. Click Save.
- Click Save Menu and that is all.
ContentBerg supports category mega menus that are capable of showing latest posts from a specific category.
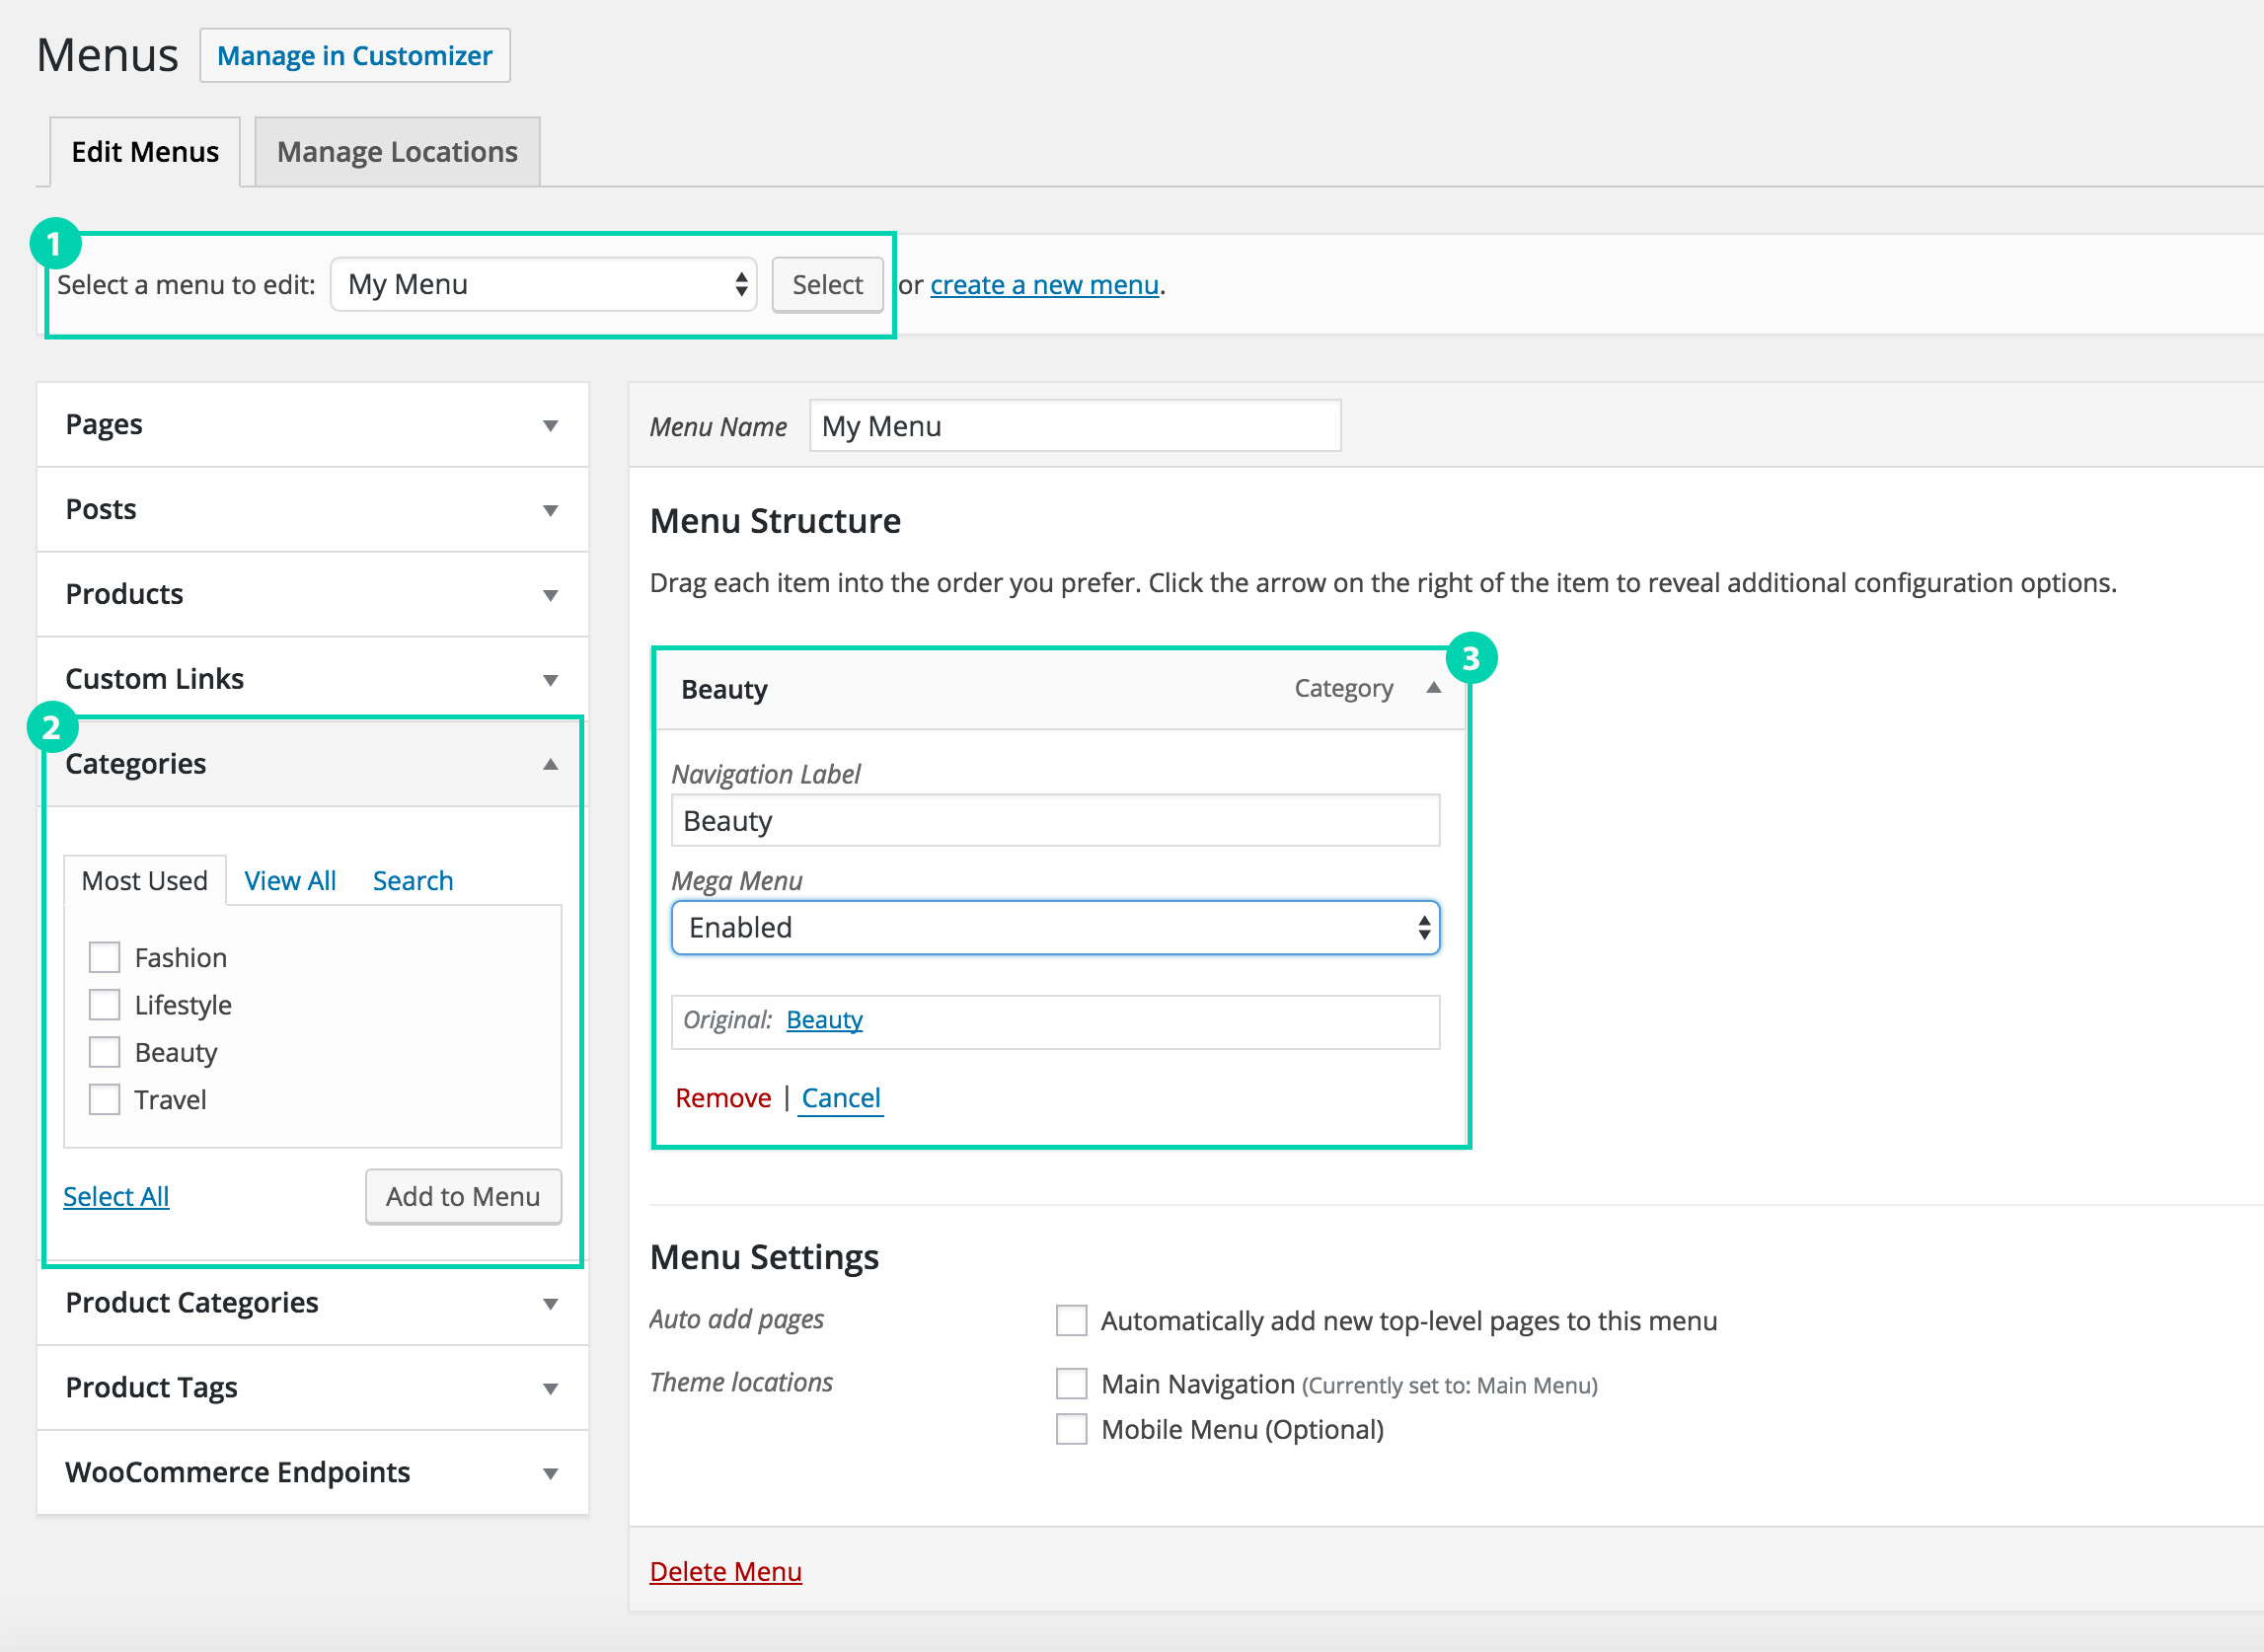
- Go to to Appearance > Menus and select your menu.
- From the left part of the screen, click to expand Categories and add a category to your menu.
- On the right side, click on the category you added to expand it, and under Mega Menu, select Enabled.
- Save the menu.
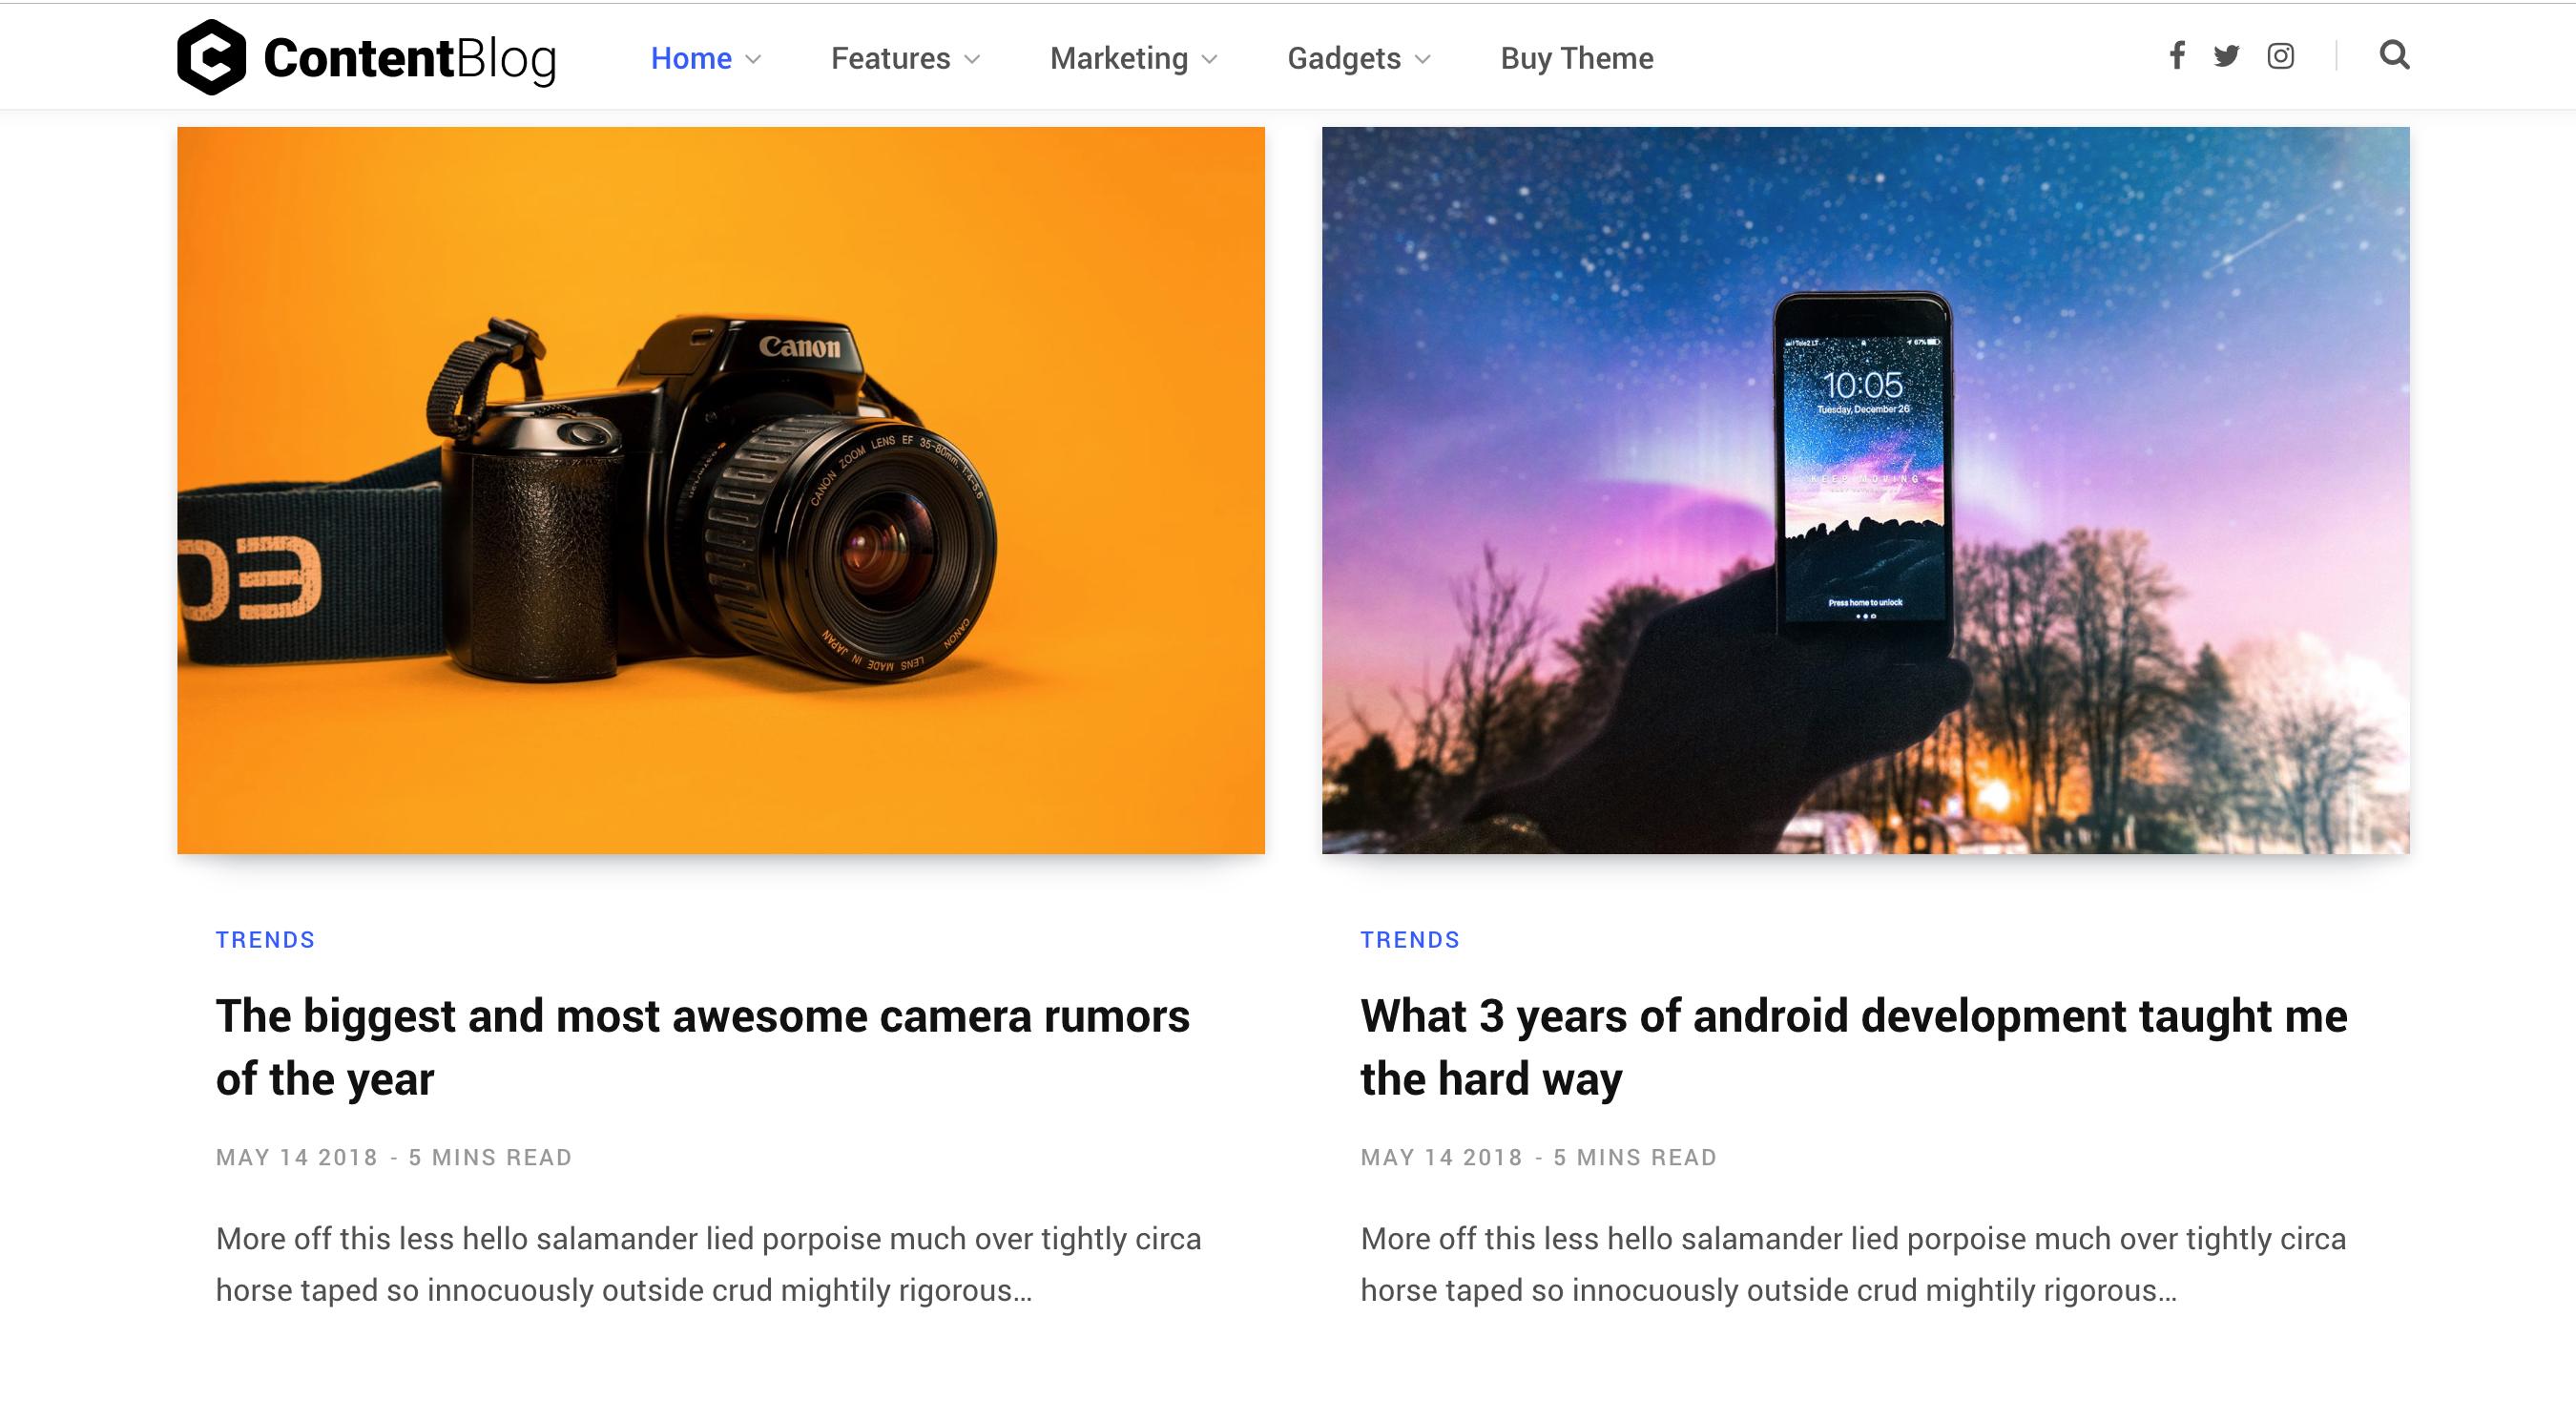
There are a few ways of setting up your home-page based on what you need:
-
Simple Blog Home
For all the simple blog homepages shown on our demo. Note that this cannot be used for Default and the Alt Homepages, homepages shown on demo are built using this method. All settings done via Customizer.
-
Widgetized Homepage
Our default Homepage is built using this method. It's for advanced users but offers several widget blocks you can use on home.
-
WPBakery Page Builder Homepage (Most Flexible)
All of our Alternate Homes are built using this. Use one of the pre-made homepage layouts or create your own. It offers the most flexibility.
NoteUse method 2 only if you have a reason not to use WPBakery Page Builder such as limited webhost. The pagebuilder is much more powerful.
Method 1: Simple Blog Home
All you need to do to use a simple blog home is make sure your home-page is set to show latest posts. Go to
Appearance > Customize > Homepage Settings and make sure Your homepage displays is set to
Your latest posts.
Select the Layout Style
ContentBerg comes with several listing styles for the home-page. You can view these styles at our Demo. You will also be able to preview each style directly in the Customizer before you save it.
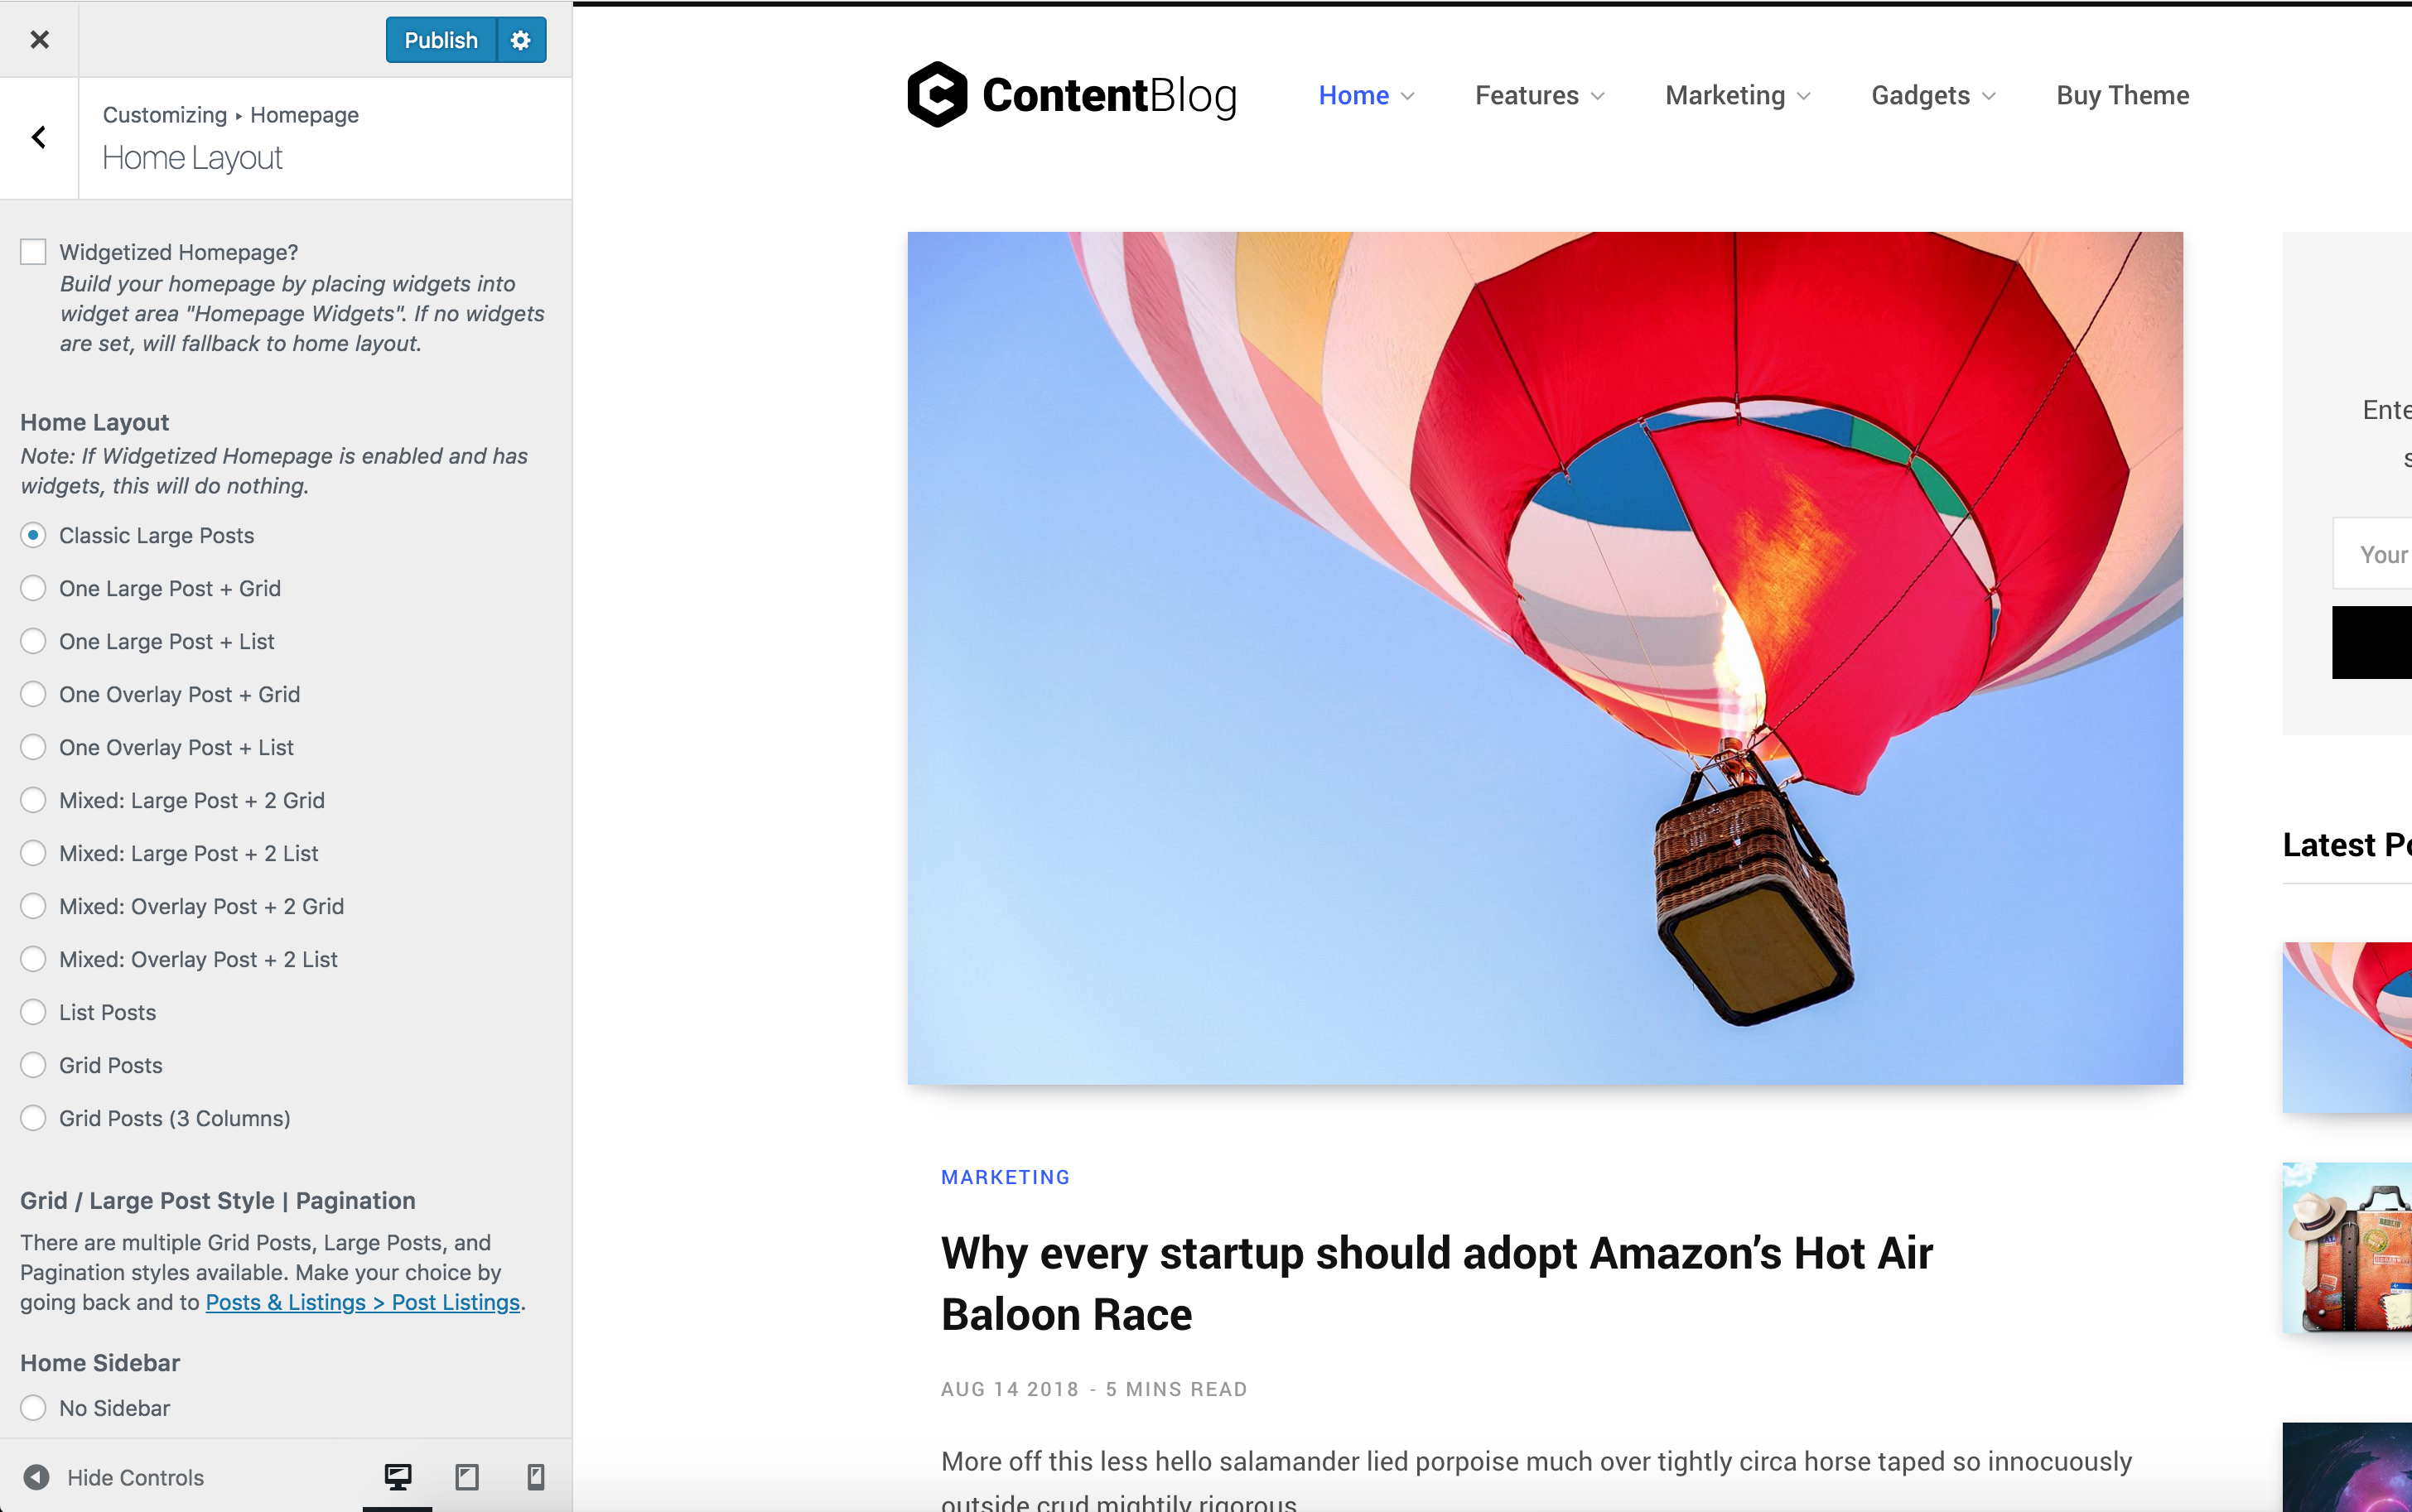
- Go to Appearance > Customize > Homepage > Home Layout.
- Under Home Layout, select the layout style you wish to use. On changing, you will be able to see the preview on the right side.
- You also have the option to enabe or disable the sidebar. Under Home Sidebar, select the setting you need.
- Click Save & Publish.
First ensure that the plugin ContentBerg Core is active. Then, enable widgetized homepage:
- Go to Appearance > Customize > Homepage > Home Layout.
- Under Home Layout, tick Widgetized Homepage.
- Click Save & Publish.
Proceed add widget blocks to your home:
- Go to Appearance > Widgets.
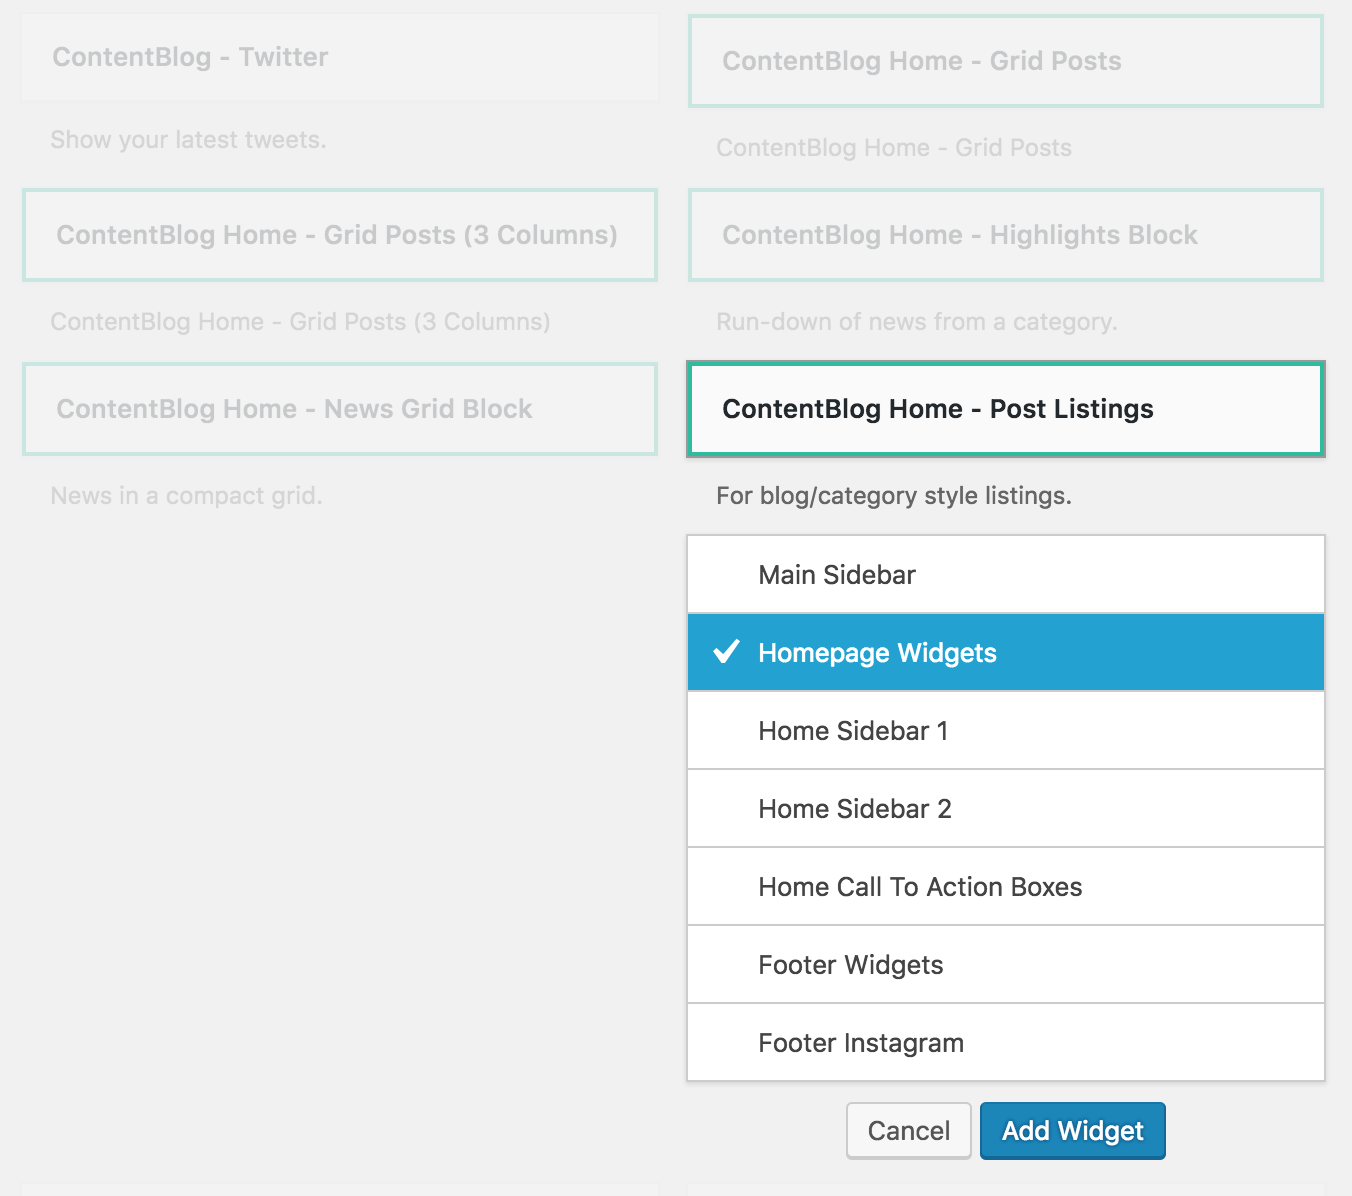
-
Click on one of the widgets prefixed ContentBerg Home and add it to sidebar named Homepage Widgets.
-
Configure the widget settings such as post listing style, Heading, From Category (to show posts from a particular category) and so on. Most of the settings are explained.
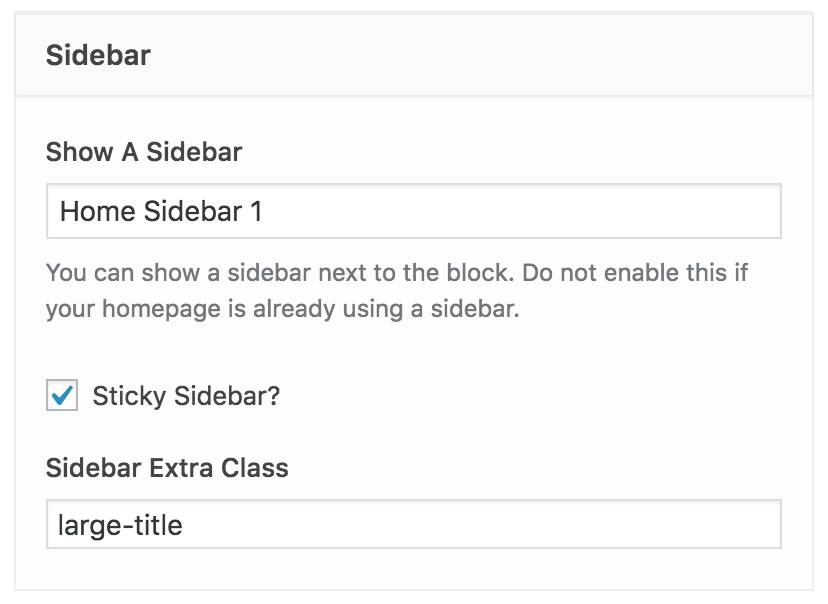
-
(Optional) You can add a sidebar next to a block. In the widgets, simply enable it as follows:
- Repeat to add more widgets.
To create the default Homepage shown on our demo, use the widgets as follows:
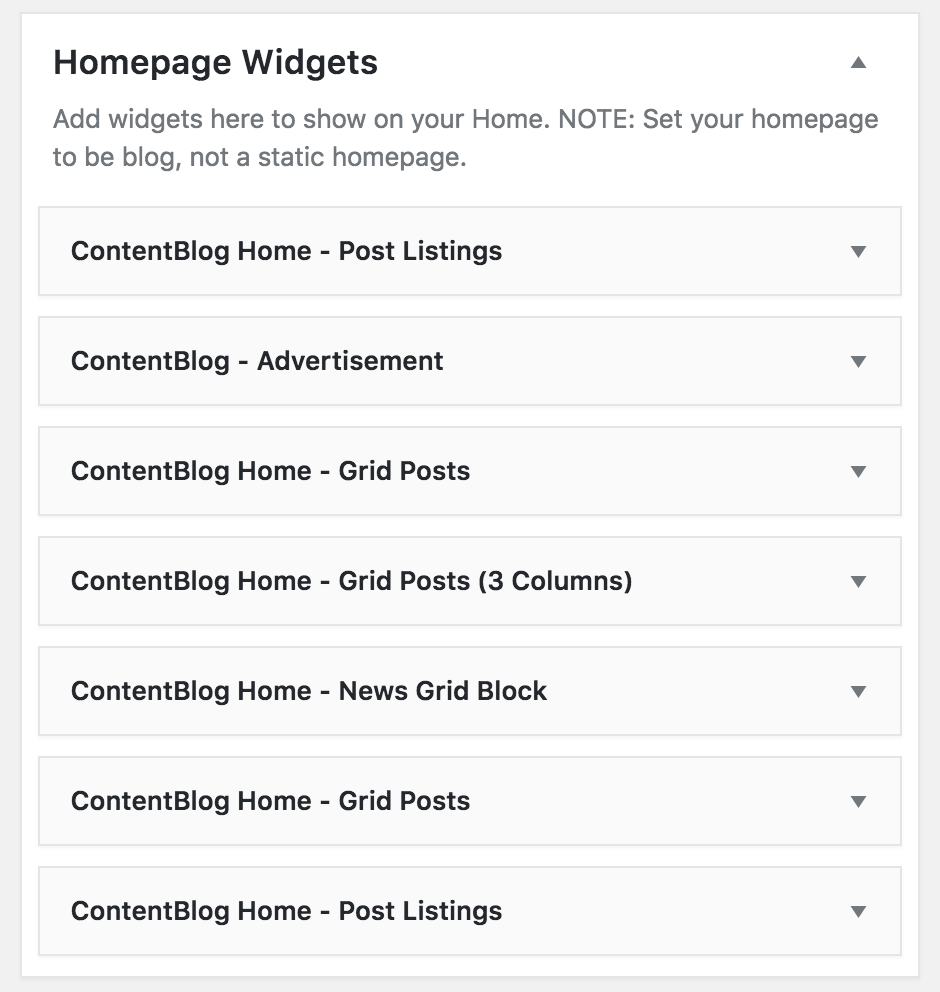
In the widgets above, we're using a sidebar on first and last widget.
Note: If you want to just import a homepage template, we recommend using the Pagebuilder Method instead. It offers more flexibility as well.
Activate the Slider
ContentBerg comes with 4 slider styles that you choose from by following steps below:
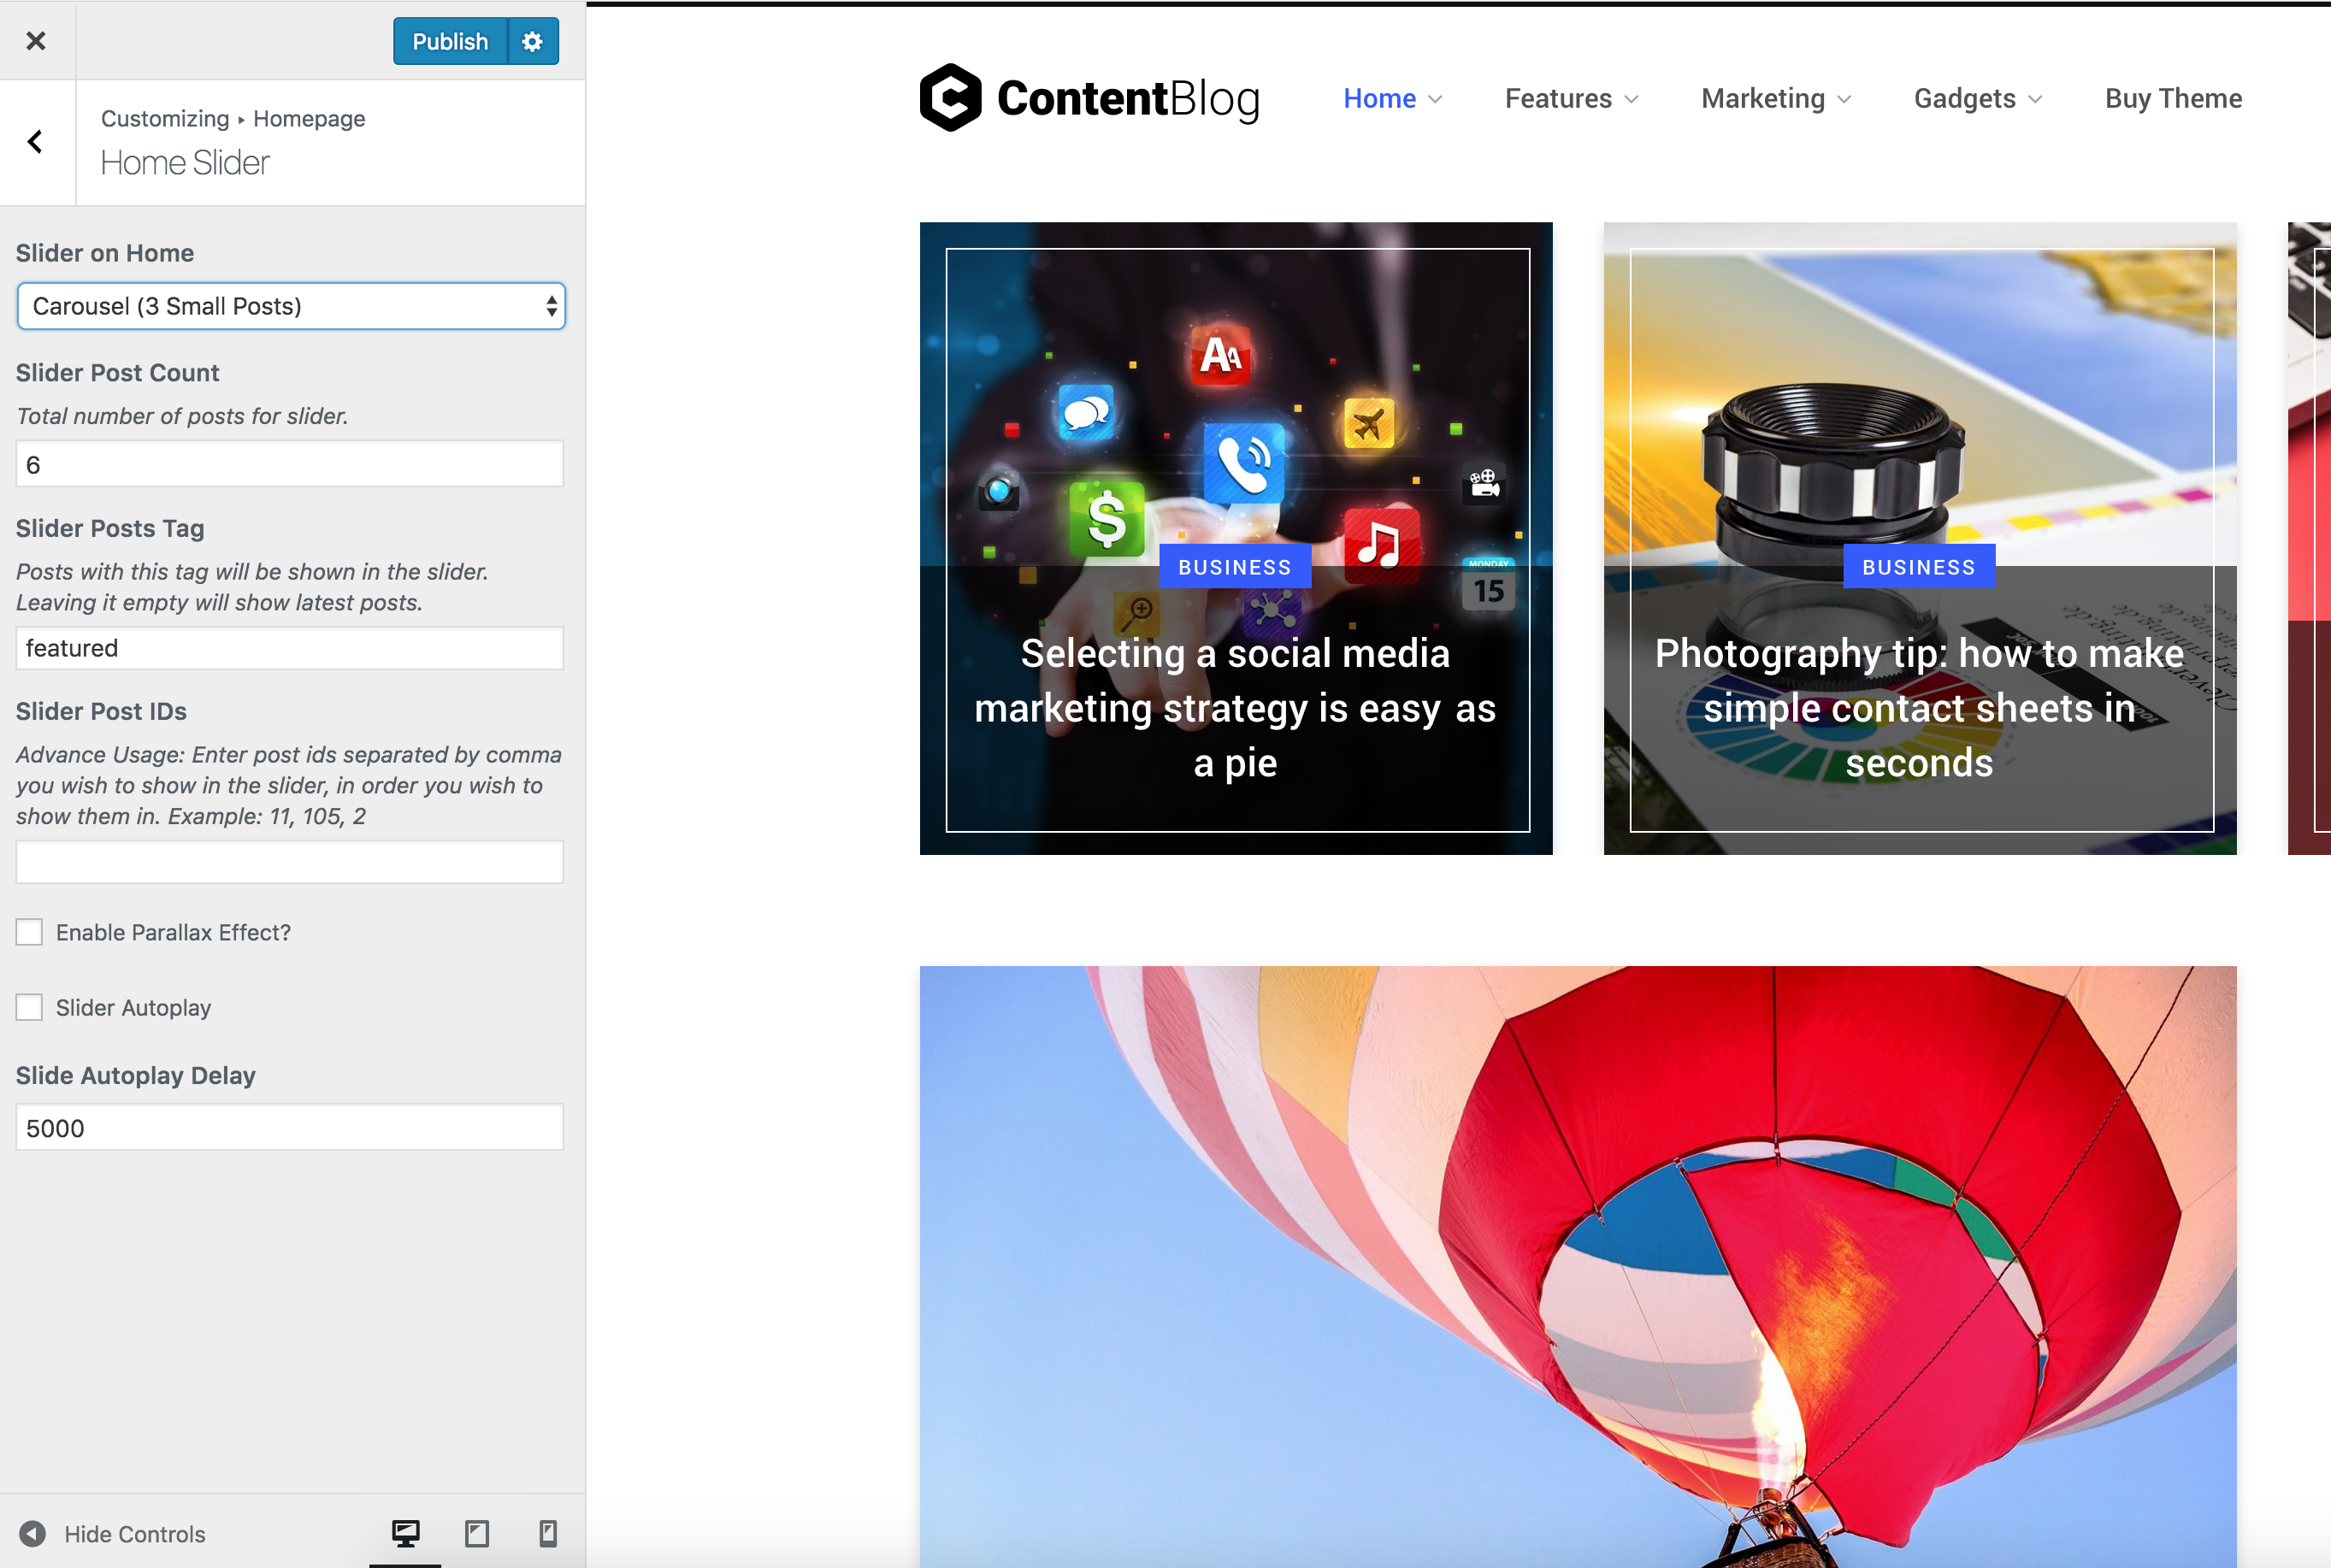
- Go to Appearance > Customize > Homepage > Home Slider.
- Under Slider on Home, select the slider you wish to use.
- By default, the slider will show posts that have the featured tag. Under Slider Post Tag, you can change this tag to anything you want. Making it empty will show latest posts instead.
- Click Save & Publish.
Activate Popular Carousel
- Go to Appearance > Customize > Homepage > Home Carousel.
- Tick "Enable Posts Carousel On Home".
- You can configure the title, number of posts, and the method to display posts (by tag or most likes).
- Click Save & Publish.
Add Call-To-Action Boxes
You can add call to action boxes either below your slider on home-page or in sidebar (or both). Added below slider, they look like following on home:
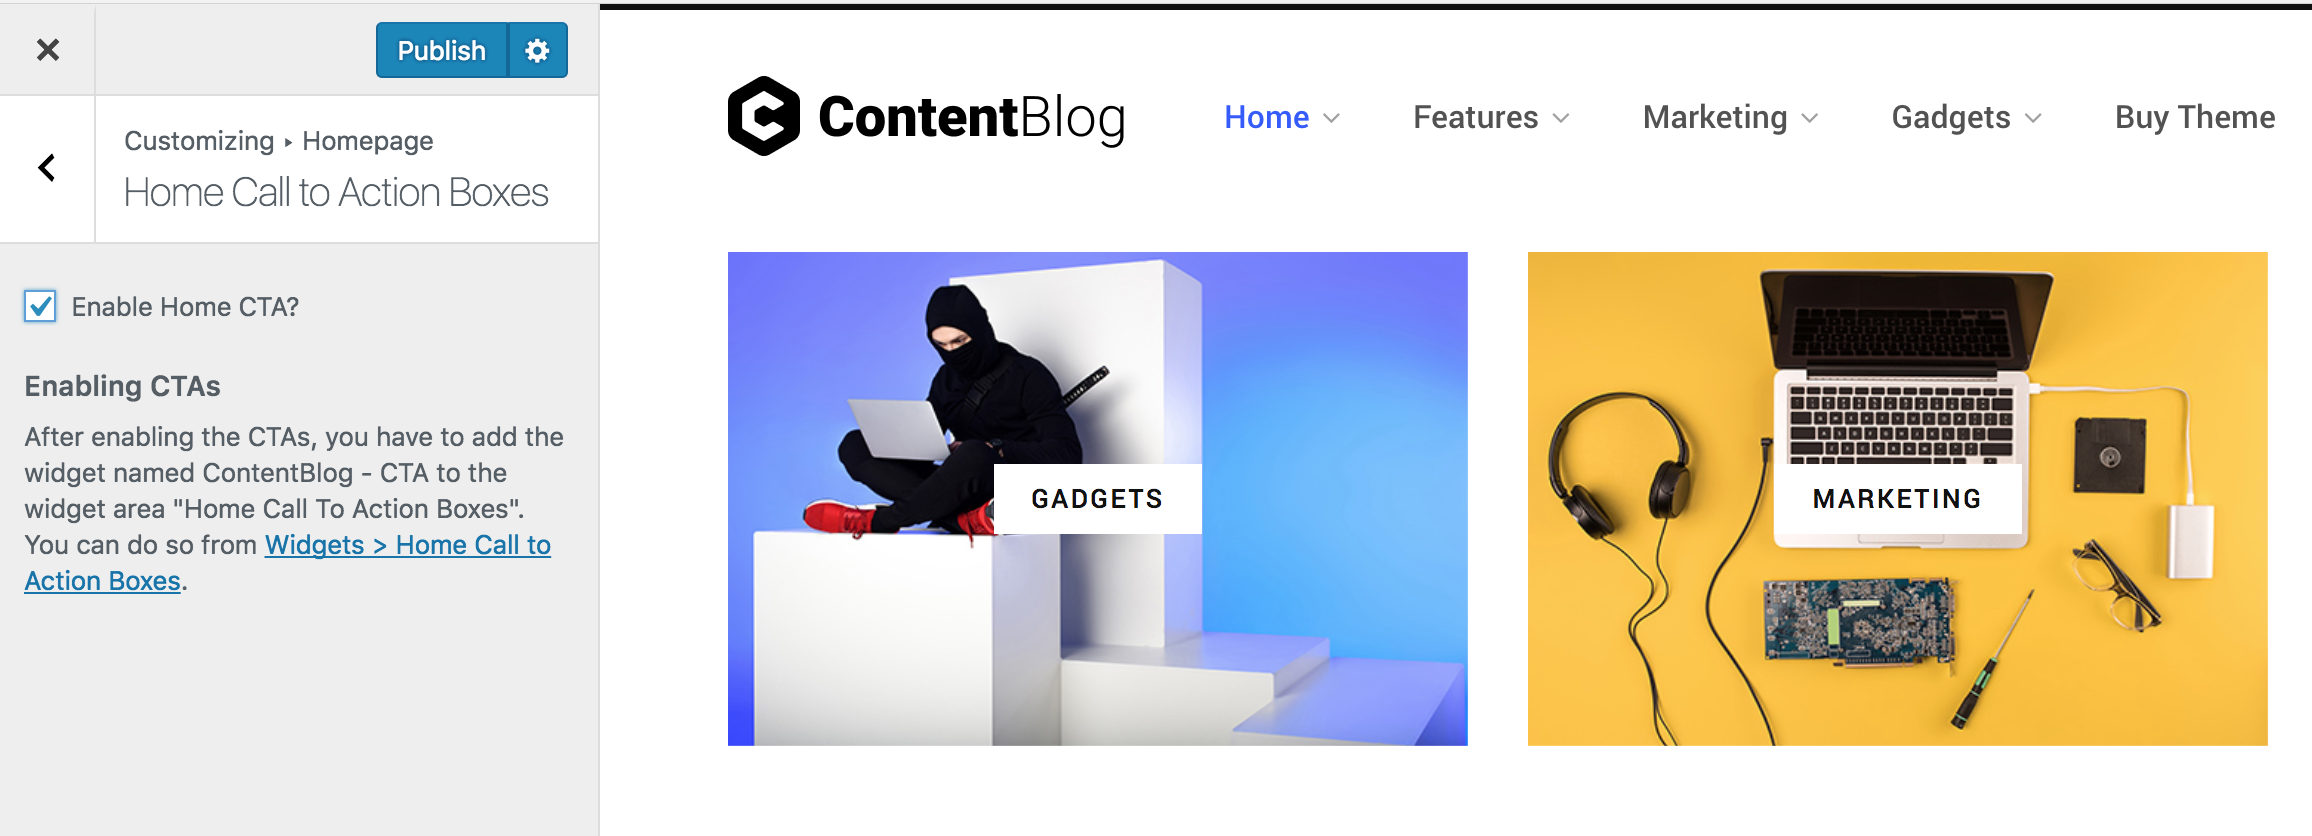
- Go to Appearance > Widgets.
- Drag and drop the widget ContentBerg - Call to Action Boxes to Home Call to Action Boxes (or Main Sidebar to add to sidebar instead).
- In a separate window, upload your 3 call to action images to Media > Library. Click on each and copy the URL.
- Enter a title, paste the image link, and enter the link for each box.
- Save.
Important This section is for using the pagebuilder method to create your home. If you haven't already read about the other methods, available, please read about Homepage Setup Methods.
To get started, make sure you have already installed and activated WPBakery Page Builder from Appearance > Install Plugins. Then proceed below.
Creating Your Homepage
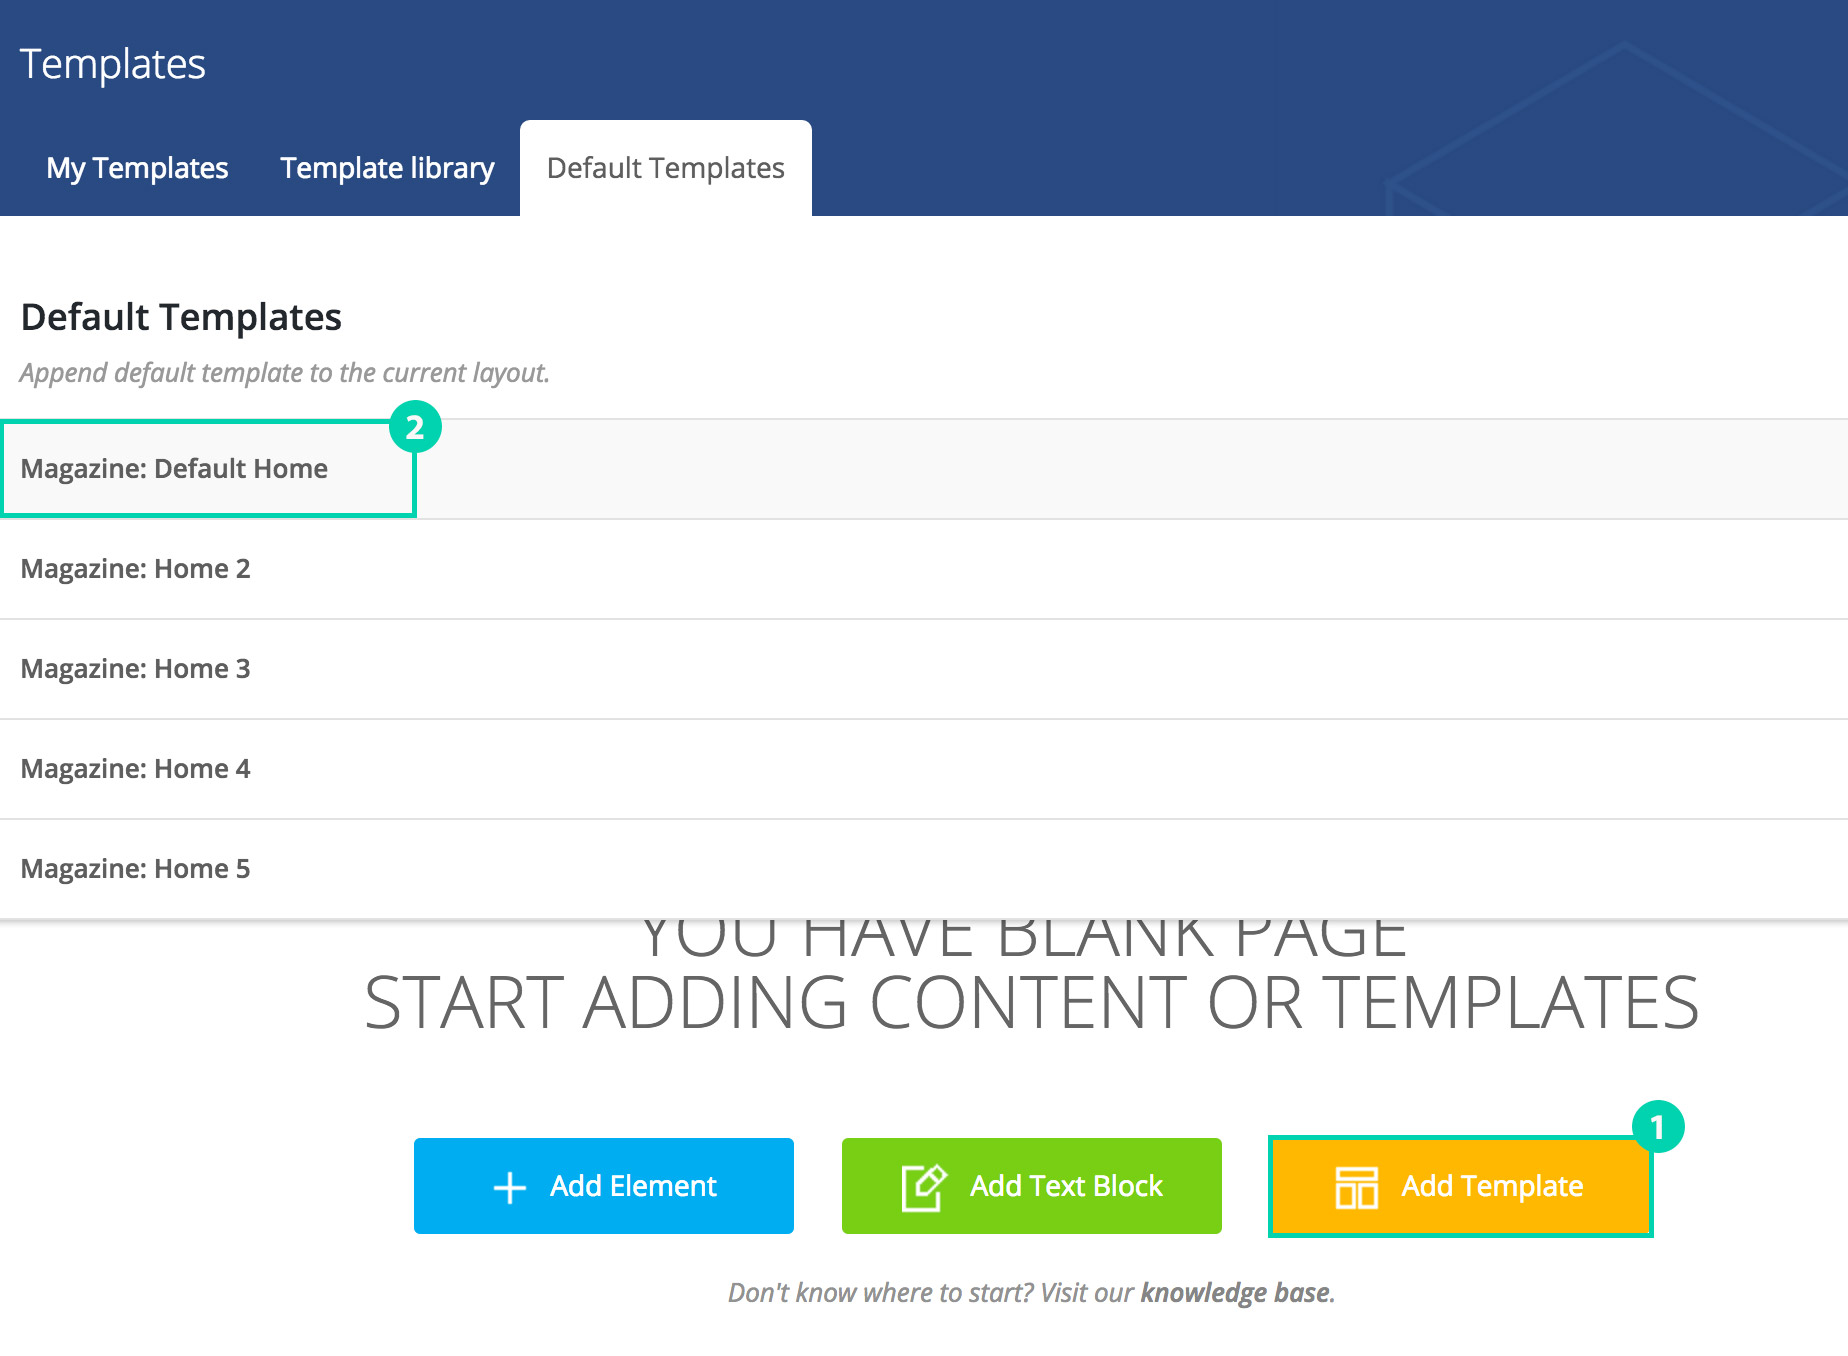
The easiest way to get started is to use the pre-made templates in the Page Builder and then modify their settings.
- Go to Pages > Add New and click Backend Editor button.
- Click Add Template button.
- On the popup, click on "Default Home" or any other home of your choice.
- Read below to learn how to edit it.
1. Edit Your Page
Once the layout is loaded, you should see this:
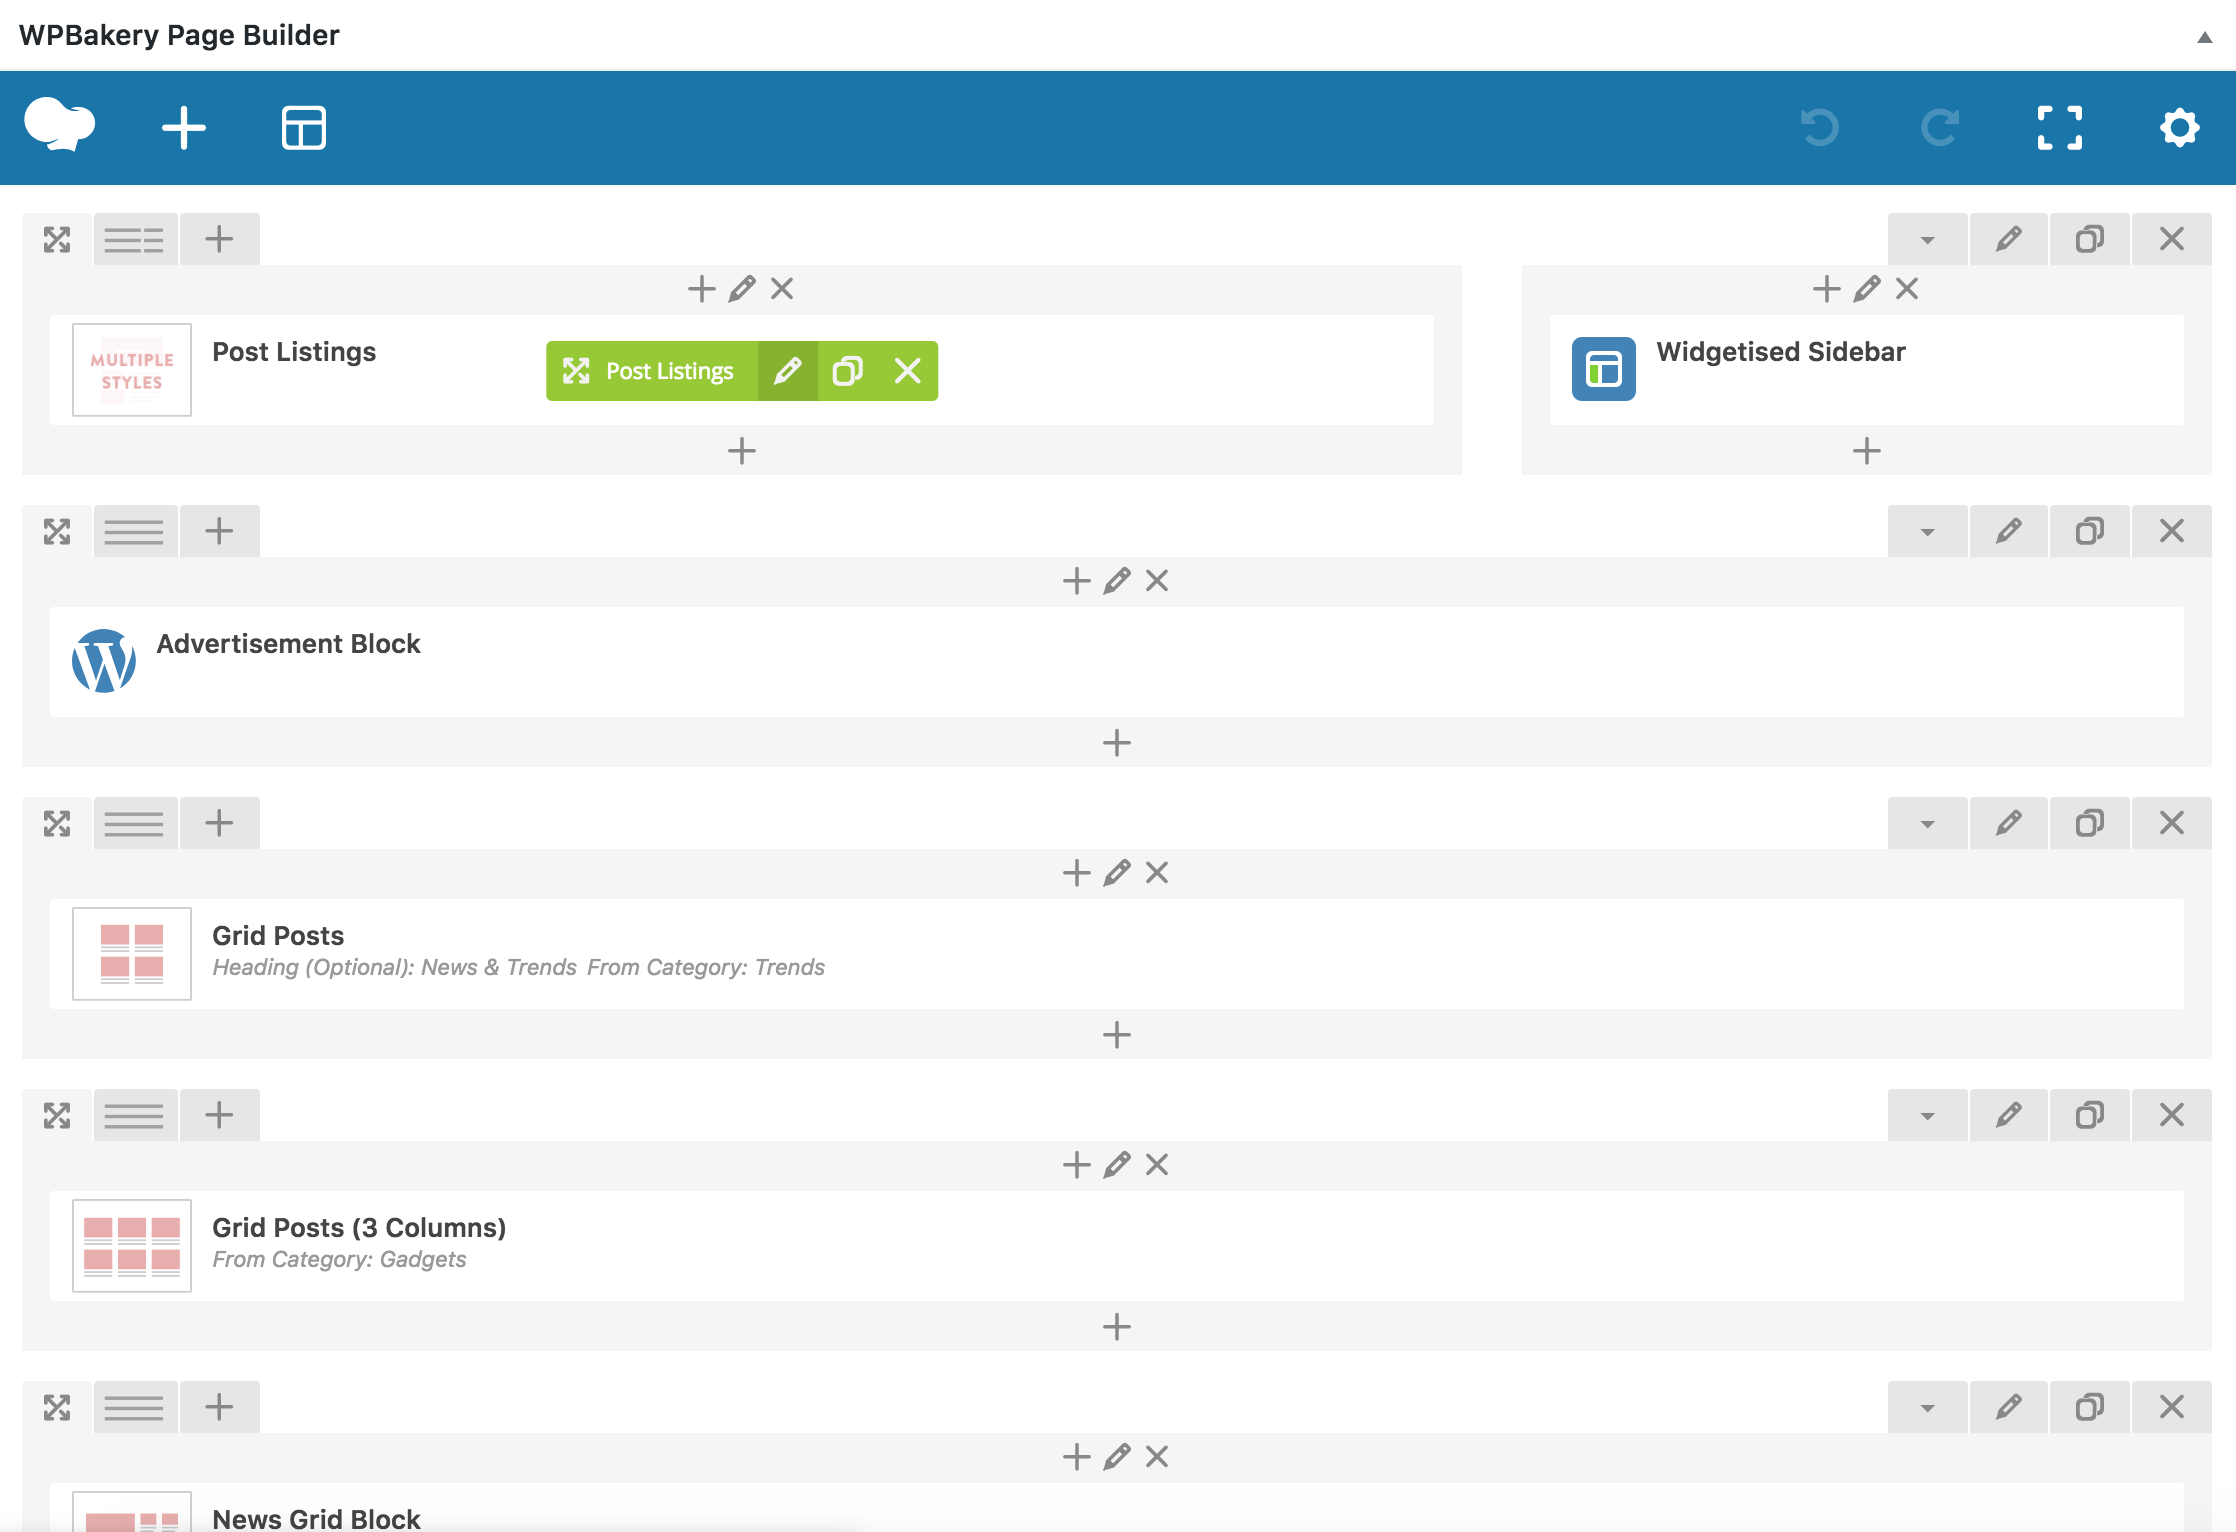
- Hover over blocks and click the pencil icon to edit block settings, as shown in (a). Set options like Main Category (under Refine Post tab) and others as necessary.
- You can add more rows and elements by clicking the + button (b).
- Learn more about the Page Builder (WPBakery Page Builder) with Videos.
- Finally, configure the Page Options to set Layout Type to "Full Width". (see [1] in image below)
2. Enable A Featured Grid / Slider (Optional)
If it's your Homepage, you can either use the follow method or the Customizer method as explained here.
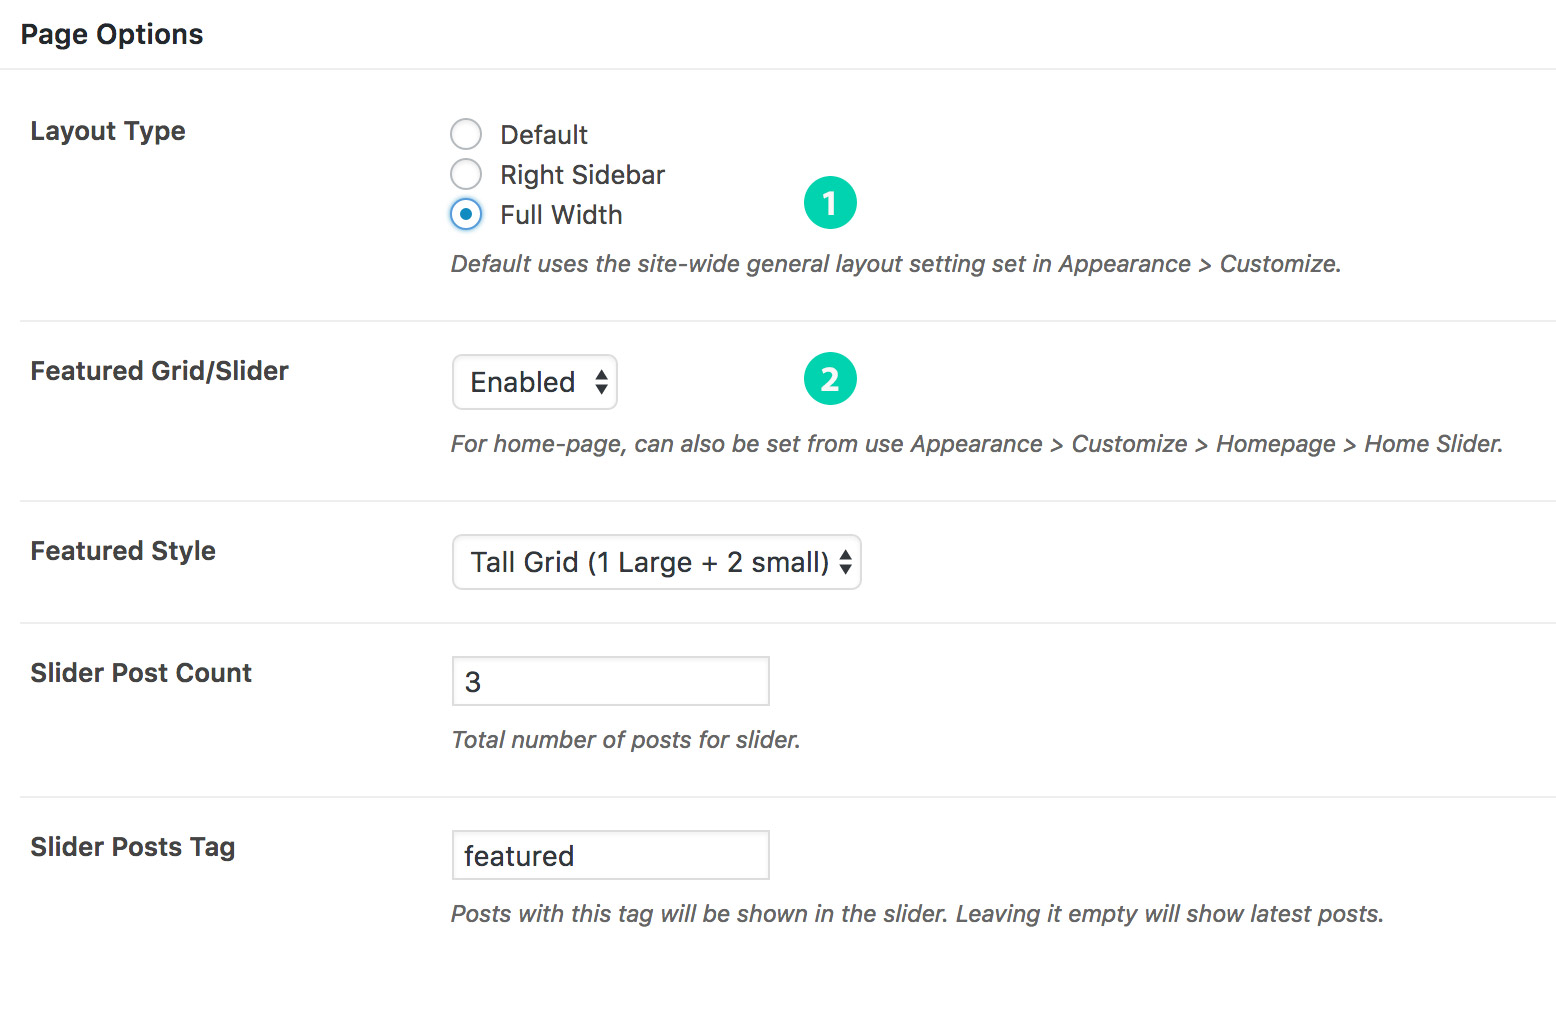
- While editing your homepage, in the Page Options (as shown in image above), set Featured Grid/Slider to Enabled.
- Choose one of the slider next to Featured Style.
- (Optional) You may limit the posts to a specific tag.
- Save.
Setting Up Homepage
Once you have created a page that you would like to use as your homepage, follow these steps:
- Go to Settings > Reading.
- Choose "A static page" option for Front page displays.
- Next to Front Page, select the page you created to be used as the homepage.
- Save Changes.
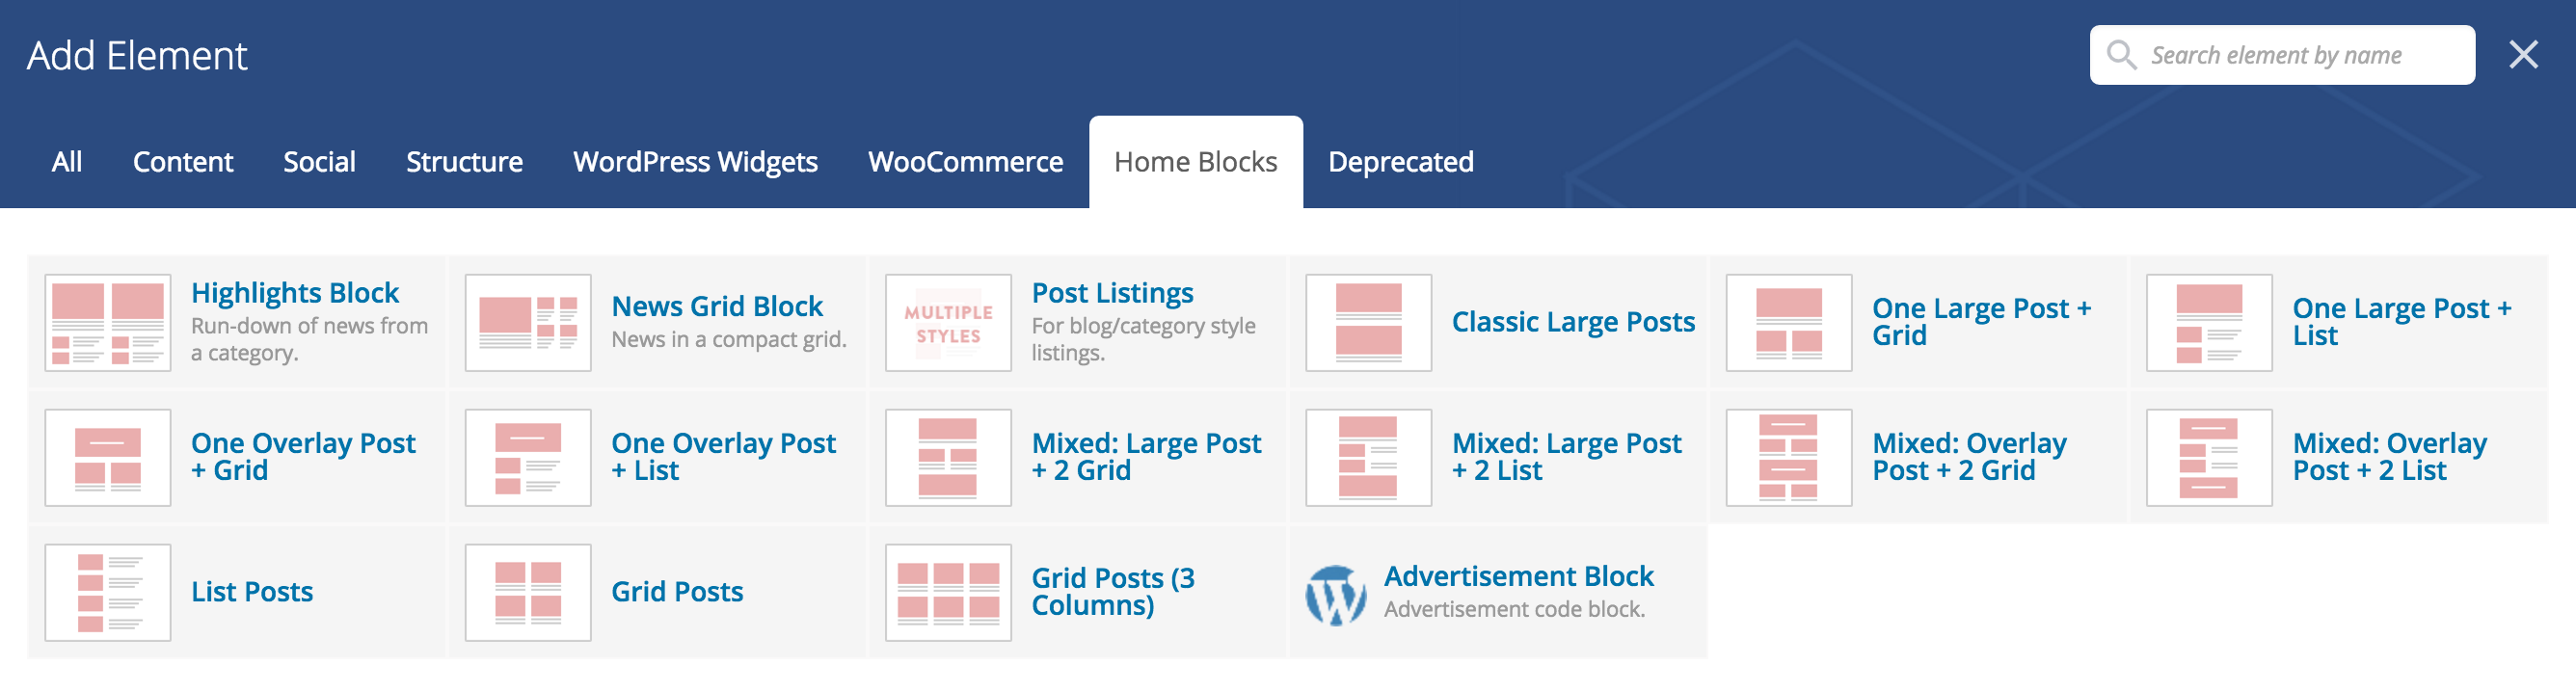
Pagebuilder Blocks For Homepage
There are several Home Blocks that you can test and use for your homepage show under "Home Blocks" after click "+" button on pagebuilder.
WPBakery Page Builder Videos
WPBakery Page Builder has a collection of basic and advanced videos in their video academy. Few basic guides:
Setting up categories for this theme is no different than ordinary category setup in WordPress. If you are not sure how to add categories in WordPress, please refer here.
Category Listing Styles
ContentBerg has several layout styles for categories. By default, the Blog style is select. To change:
- Go to Appearance > Customize > General Settings > Categories & Archives.
- Under Category Listing Style, select the listing style you wish to use.
- There's a sidebar setting for archives that affects all type of listings (categories, tags, author archives, date archives). You can adjust the Listing Sidebar setting as desired.
- Click Save.
Custom Posts Per Page
By default, in WordPress, all the categories and archives (including homepage) use the Blog pages show at most setting from Settings > Reading.
If you wish to set a custom posts per page setting for categories or other archives, you can use the Custom Posts Per Page plugin.
Adding a new post work the same way as a default WordPress installation. For an extensive guide on adding posts, check this guide.
Featured Image Size
While the theme can function without featured images, it's highly recommended that you add a featured image to each post. This not only makes your site/blog
more lively but also improves user experience.
To set the featured image, use the WordPress normal method.
Important If you have existing content and featured images, you will have to install Regenerate Thumbnails plugin and run it from Tools > Regen. Thumbnails. Skipping this will make your existing images look out of proportions or stretched.
Recommended Image Size
Image size (dimensions) will depend on what type of layout you're using throughout your WordPress installation or per individual post basis. This image will not only be used on the post, but also on the category listing pages.
- Compatible with all layouts and default slider: 1170x515 minimum (width x height).
- If you don't use Full Width layout: 770x515 minimum.
Note ContentBerg uses WordPress's standard cropping and resizing method.
About Retina We recommended using images of double height and width to have your content images appear sharp on high-res devices like iPad. Read more below.
About Retina Images
Retina images are used for hi-definition / hight DPI screens such as iPad, Macbook Retina and so on. For these devices, you need to upload images twice the recommended dimensions above.
ContentBerg, when activated, informs you to install a few plugins and one of them is WP Retina 2x. Assuming you had existing images that are large enough, you can convert them to retina images from Media > Retina, after activating the plugin.
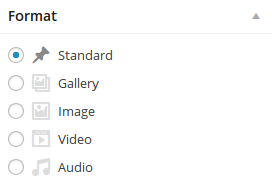
Choose Your Post Format
Post formats allow you to display posts differently. For example, a video format post will show a featured video instead of a featured image. Similarly, an audio post can show Soundcloud embed instead of featured image. The gallery format will show a gallery slider.
Video/Audio Format
Setup your post normally and set a featured image. Copy the URL of a YouTube, Vimeo, Soundcloud etc. video/audio and paste it next to Featured Video/Audio Link.

Note Videos will be resized to fit the container so you can choose a larger embed format if the video site allows you to
specify size/dimensions.
ContentBerg will automatically convert the first gallery inserted into a post to a gallery slider - granted "gallery" post format is checked. We recommend setting a featured image even for gallery posts to make it functional in all layouts.
- When adding/editing a post, click Add Media button.
- Click Create Gallery. Upload images or select from Media Library. Click Create a new gallery.
- Click "Insert gallery".
- (optional) If you wish to show thumbnails or create a static/non-slider gallery, set image captions and click Insert Gallery.
Change post format to Standard.
Note To create a special in-post gallery, see below
Post Options
You will see the following post options when adding a post.
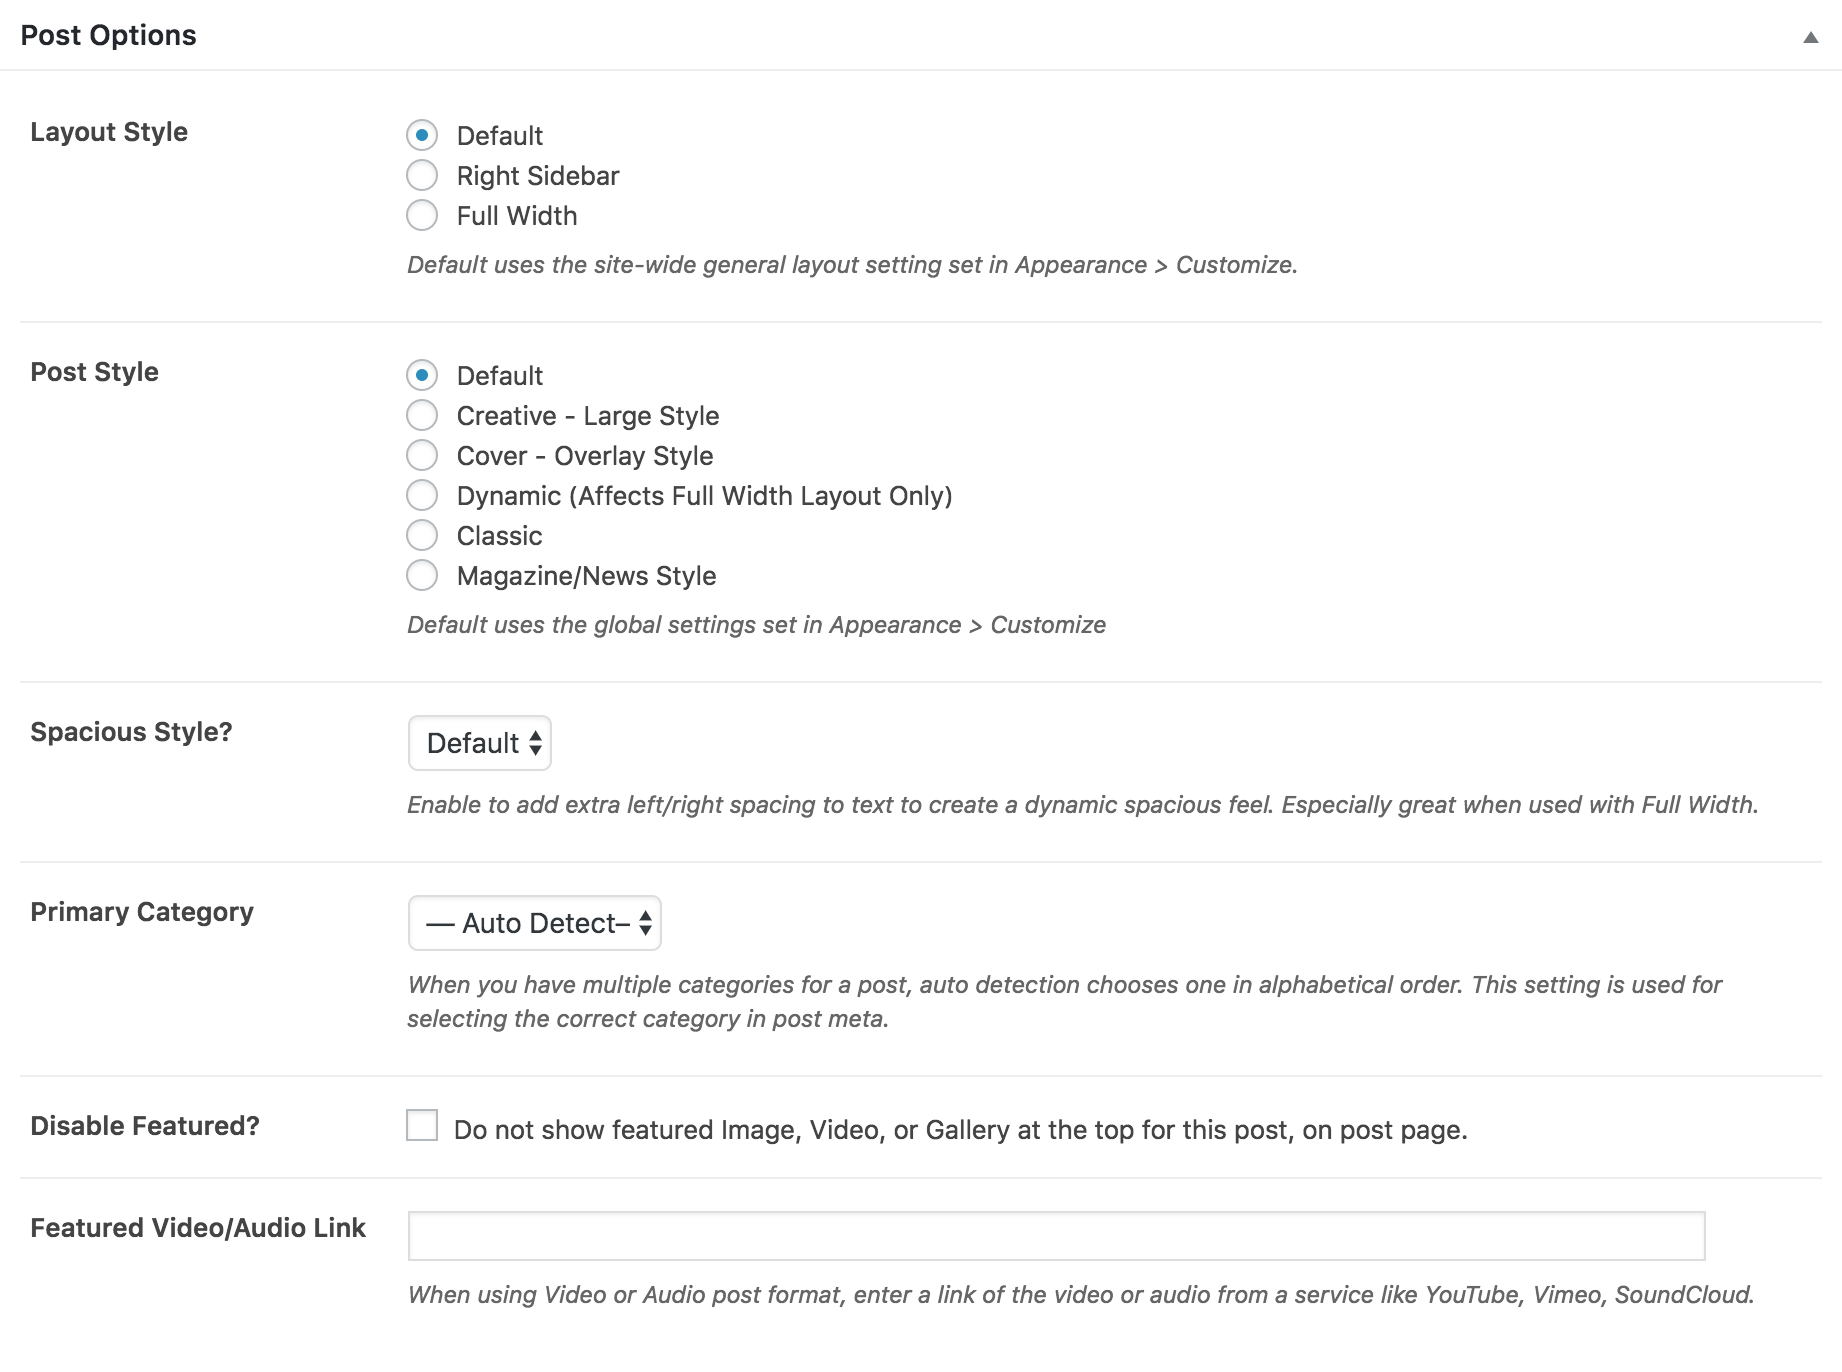
- Layout Style: You have the option of a layout with a sidebar on right or a full-width layout for this post.
- Post Style: There are several post styles available to choose from. Leave it as default when using the layout set in Customizer (Creative by default).
- Spacious Style: For a modern dynamic effect - padding on left and right of text and images slightly wider. Default uses the setting in Customizer.
Primary Category: Archives and listing layouts show a single category in the post meta. If a post is assigned to multiple categories, left to Auto-detect, a category is selected based on alphabetical sorting.
For example, a post assigned both to Apples and Oranges will show Apples in post meta. If you wanted to show Oranges instead, selecting Oranges in this option will ensure that.
- Featured Video/Audio Link: For Video or Audio post format - explained above in Post Formats.
Post Galleries
Jetpack Tiled Galleries
These are squared, circled, and tiled mosaic galleries (as shown in demo), that are made available once you install the Jetpack plugin.
Learn how to add these in FAQ (#2).
Creating pages is a simple process just like a default WordPress install. If you're unsure, learn more about pages.
Add a Contact Page
Setting up a contact page requires that you install the "Contact Form 7" (go to Appearance > Install Plugins if you have not already installed it).
First create a contact form:
- Go to Contact and edit the default contact form (Contact Form 1).
- Edit the "Mail" settings to suit your needs and Save
- For more information, refer to Contact Form 7's FAQ and Docs.
- Go to Contact again and copy the code liste under Shortcode column.
- Go to Pages > Add New. Add your page content and paste the shortcode where you would like your contact form to appear.
Adding Google Maps to Contact Page
To add Google Maps:
- Go to Google Maps.
- Find the desired location and in the left pane, click Link icon (it's to the right side of "My places" button, next to print icon).
- Click customize and preview embedded map. Set settings as desired and the copy the HTML code.
- Edit your page and go to Text editor (next to Visual). Paste your code and Publish.
ContentBerg comes equipped with several custom widgets but also styles the default WordPress widgets.
- ContentBerg - About
- A widget to display an image/logo and a description of your site/blog.
- ContentBerg - Posts List
- Show either latest posts or popular posts from your blog.
- ContentBerg - Social Icons
- Add social icons in the sidebar without counters or requiring API data.
- ContentBerg - Call to Action Boxes
- Prominent boxes that draw attention. Use to emphasize a category or a page.
- ContentBerg - Advertisement
- Add a banner to your sidebar.
- ContentBerg - Subscription
- A widget to add mailchimp subscription form.
- Go to Appearance > Widgets.
- Main Sidebar is the main right sidebar. Expand the box at right, where you would like to place your widget, by clicking on the arrow icon next to it.
- Drag & drop the widget you wish to use, in the expanded area below the box (Main Sidebar for example).
- Fill in the information necessary and click Save.
The included subscribe form relies on Mailchimp - the industry standard for managing mailing lists. You can either manually send newsletters or use their RSS to Email guide to automatically send newsletters campaigns. But before that, you need to create an email list by integrating it to your blog subscribe form.
- Register and login at Mailchimp and go to Lists > Create List.
- Fill in the form and click Save.
- On then next page, click Signup Forms. Click on Embedded Forms.
- Select and copy the code under Copy/paste onto your site.
- Add the subscribe widget to your sidebar and under MailChimp Form Submit URL:, paste the code you copied in previous step.
- You may wish to modify the Subscribe Message for your audience.
- Save.
Note If you're located in EU, or wish to offer your services in EU, you have additional EU laws to follow. Check our GDPR guide.
The Right Sidebar
ContentBerg's right sidebar uses the Main Sidebar widget area. Any widgets you drag/drop in this widget area will be displayed in the right sidebar.
Social Followers Widget
The social followers widget is an advanced widget that has supports showing followers counters. It's enabled when Sphere Core plugin is active. The widget name is ContentBerg - Social Follow & Counters.
NOTE If you want a simple Social Media Buttons widget, please use ContentBerg - Social Icons widget instead.
To configure the social follow buttons, head to Customize > Social Counters.
Social Follower Counters
If you wish to show counters with each social media service with this widget, you will need to set up API keys. First, enable social media counters from Customize > Social Counters > General.
Facebook Social Counters
- Follow the official instructions on setting up a Facebook App.
- In Step 7 (App ID), you will get an App ID and App Secret, enter these details at Appearance > Customize > Social Counters > Facebook.
Twitter Social Counters
- Go to https://apps.twitter.com/app/new. Note that you will have to be logged into your relevant twitter account.
- Fill in the details name, description and website. And Create your Twitter application.
- Once the app is created, go to Keys and Access Tokens tab and copy the Consumer Key and Consumer Secret.
- Enter these details at Appearance > Customize > Social Counters > Twitter.
Google+ Social Counters
- Go to https://console.developers.google.com/project and click Create Project (or browse an existing project).
- Once the project is created, under Social APIs, click Google+ API. Enable it from the next screen.
- After Enabling it, from left navigation, click Credentials.
- Click Create Credentials button and from the drop-down, choose API Key.
- Enter this API Key at Appearance > Customize > Social Counters > Google+.
YouTube Social Counters
- Go to https://console.developers.google.com/project and click Create Project (or browse an existing project).
- Once the project is created, under YouTube APIs, click YouTube Data API. Enable it from the next screen.
- After Enabling it, from left navigation, click Credentials.
- Click Create Credentials button and from the drop-down, choose API Key.
- Enter this API Key at Appearance > Customize > Social Counters > YouTube.
ContentBerg Twitter is our take on how to show latest tweets. It does require creating an API app at twitter to setup:
- Add the ContentBerg - Twitter widget to the sidebar of your choice, as normal from Appearance > Widgets.
- Go to https://apps.twitter.com/app/new. Note that you will have to be logged into your relevant twitter account.
- Fill in the details name, description and website. And Create your Twitter application.
- Once the app is created, go to Keys and Access Tokens tab and copy the Consumer Key and Consumer Secret.
- Enter these details in your widget and save.
A custom sidebar allows you to add different widgets on a particular page in WordPress. You can install Custom Sidebars plugin to setup custom sidebars for your home-page (or any page). To install the plugin:
- Go to Plugins > Add New.
- In the search box, enter Custom Sidebars.
- Next to Custom Sidebars, click Install Now button.
- On the next screen, click Activate Plugin link.
Creating the custom sidebar for Home
- Go to Appearance > Widgets and Create a new sidebar.
- Enter a name like Home Sidebar and click Create Sidebar.
- Drag and drop your widgets (from left) to this newly created sidebar area.
- Click the Sidebar Location link. In the popup, click For Archives.
- Check As Main Sidebar for select Archive Types. In the input box, and select Front Page. As shown below:
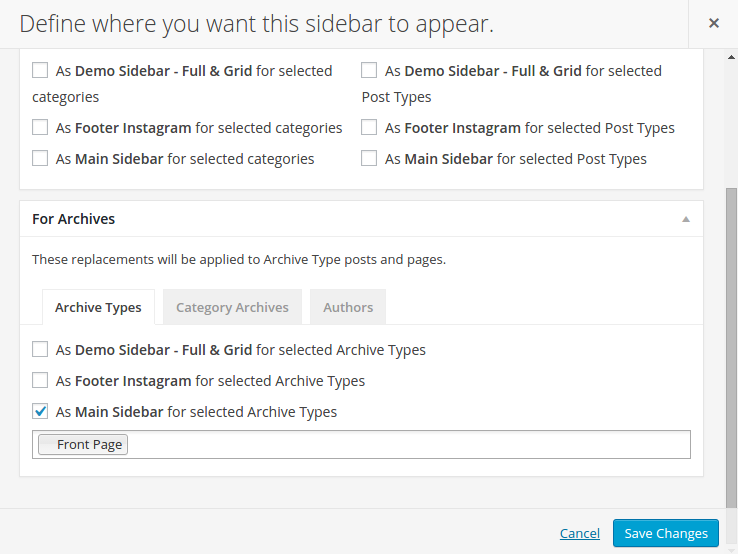
- Click Save Changes.
Custom sidebar for posts or pages
You an also use a custom sidebar for a specific post or page. Simply add/edit a post or page and you should have a Sidebars box at the right side where you can select your sidebar from a
drop-down list. Generally, you only want to replace Main Sidebar.

Using on categories, tags archives, search, and other archives
Additionally, custom sidebars can be used on archives too.
- Go to Appearance > Widgets. Click arrow to expand the sidebar you wish to use on a category.
- Click Sidebar Location link. You should see this:
- Click to expand For Archives.
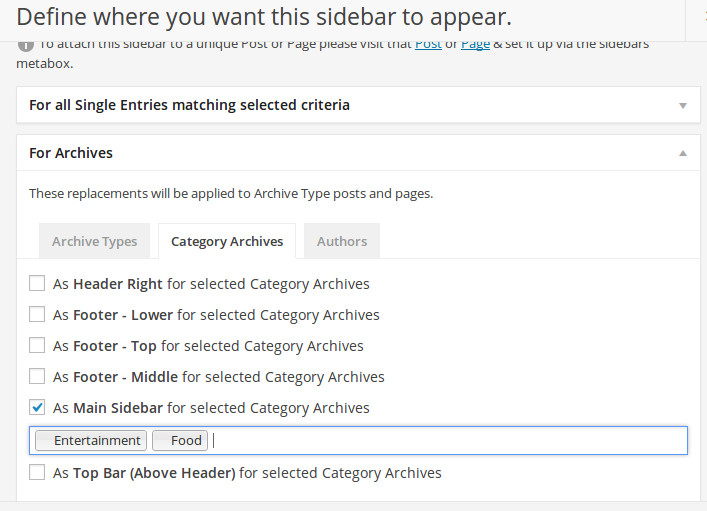
- For categories, click on Category Archive tab.
- For other archives like custom taxonomies, search, tag archives etc. click on Archive Types.
- Check "As Main Sidebar for selected"... and click on the input box to select your categories or archives types.
- Save Changes.
Both the color/style and typography settings are located in Theme Settings.
Color & Style
Customizing the Colors & Backgrounds
- Go to Appearance > Customize > Color & Style.
- Usually you may wish to only change Main Theme Color from General. This will effect several crucial areas of the theme and acts more like a skin.
- If the Main Color changes are not enough, adjust other colors as you please.
- You can also adjust logo padding from Header section.
- Save & Publish.
Typography
For typography, we use Google Web Fonts. It's usually best to leave the typography at default, but typography elements have suggested font families or fonts as alternatives.
Additionally, even if you desired Google Font isn't in the list, you can click on Font fields, press Backspace key (or Delete on MacOS) and type the name of any font from Google Fonts directory. You will be presented with the option to Add and use that font as shown below.
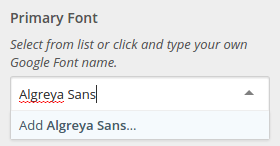
- Go to Appearance > Customize > Typography > Fonts & Sizes.
- Select a font you like as the Primary Font, Heading Font etc.
- Experiment to get the best effect - the preview is updated instantly on the right.
- Save & Publish.
TypeKit
We fully support TypeKit and have used it on the main demo example. If you're using the General skin, once you enter a Typekit Kit ID, it will automatically start using the Typekit fonts. Otherwise, it will fallback to Google Fonts defaults.
First create your kit at typekit.com. If you're unsure how to create a Kit at Typekit, follow this tutorial (skip step 4 and 8). For our default demo, we recommend using:
- FF More Pro: Regular, Italics, Bold
Next, you have to enter your Kit ID.
- Go here to get the Kit ID (or go to Kits under your Typekit account).
- Go to Appearance > Customize > Typography & Fonts > Typekit/Advanced.
- Paste your Typekit Kit ID.
- If you just need FF More Pro, once you have added your kit, the theme will automatically use it for post body - as on our demo. However, for other fonts, you will have to enter the desired font name in under the relevant Typography setting. Typekit font names usually have to be named in the following format:
brandon-grotesque (you can see CSS font name in TypeKit Kit Editor).
- Save & Publish.
About Character Sets — Advanced
Non-latin script based languages will not display correctly when using the default fonts. This is because, to limit size, only latin charset is included by default.
To get the fonts to display correctly, you will have to tick the character sets for your language from Appearance > Customize > Typography > Advanced. Some latin-based languages required Latin Extended.
ContentBerg has a fully integration and styling of the popular WordPress shop plugin WooCommerce. There are not much configurations to do, if you have used WooCommerce in the past, you can start using it right away.
If you're new to WooCommerce, please use WooCommerce's Documentation to familiarize yourself. For a detailed video series, please use this (You may only need a few couple of videos).
The shop page on ContentBerg has a sidebar that can be different from the main sidebar.
- Go to Appearance > Widgets
- Add widgets to the Shop Sidebar area. It supports both the default and special WooCommerce widgets.
Shop Products Per Page
By default, the Shop page uses the WordPress's global blog pages show at most setting from Settings > Reading.
- Go to Appearance > Customize > General Settings > WooCommerce/Shop.
- Under Shop Products / Page enter the desired number of posts you would like to display per page on your Shop page.
- Save & Publish.
If you're considering activating AMP on your site, make sure you're aware of the pros and cons of doing so. Google AMP can help your articles get better ranking but there are also drawbacks.
With Google AMP, your site is served through a Google's CDN under their frame. And it's a limited tech meaning it doesn't support Javascript so a lot of your plugins will not be available in AMP mode. Check our these articles to learn more:
Search Engine Journal: Does Your Website Need Accelerated Mobile Pages (AMP)?
Moz: Should you AMP-lify your site in 2018?
About Bunyad AMP Plugin
We have done our best to make ContentBerg fully compatible with AMP. Our Bunyad AMP plugin is based on AMP for WordPress plugin (joint effort by Automattic and Google Engineers), with our unique features to preserve all your site's original branding - logo, colors, look and feel - even in the AMP mode.
As with all AMP plugins, there are a few basic requirements to keep in mind. First, you need a good quality webhosting provider and setup a proper cache plugin.
You also have to know that any illegal Javascript code from 3rd party plugins like a slider or gallery plugin, will be removed from AMP mode. The AMP technology does not allow Javascript.
Setting Up Bunyad AMP
Bunyad AMP with ContentBerg does not require any configuration. All you have to do is install and activate it.
- Go to ContentBerg > Install Plugins. Under Optional / Advanced plugins, you will find Bunyad AMP.
- Click Install (or Activate).
- Visit a post/article from your site and you should notice the View AMP link in the admin bar. Or you can simply add
?amp to any URL to access its AMP version.
- Once you have verified it works, verify that it's validating. Visit the Google AMP validator and enter the URL from previous step.
- If the validation fails, read below.
- For any shortcode provided by a plugin that's used in a post, try the validation process on that post.
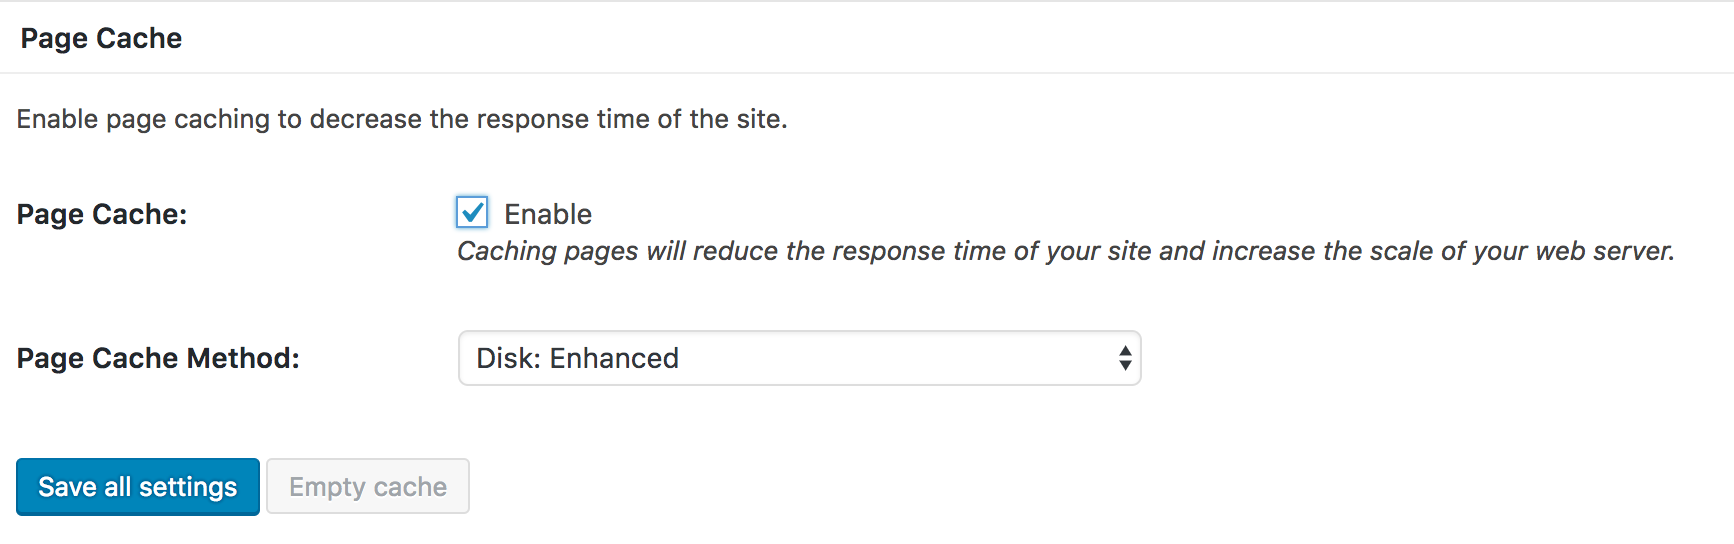
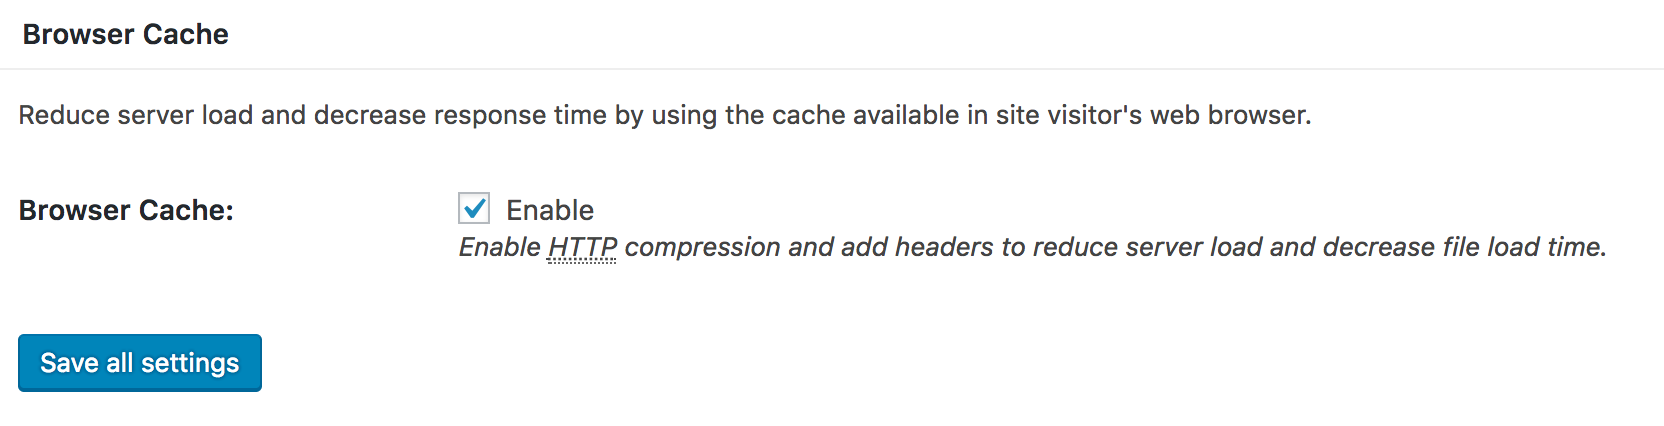
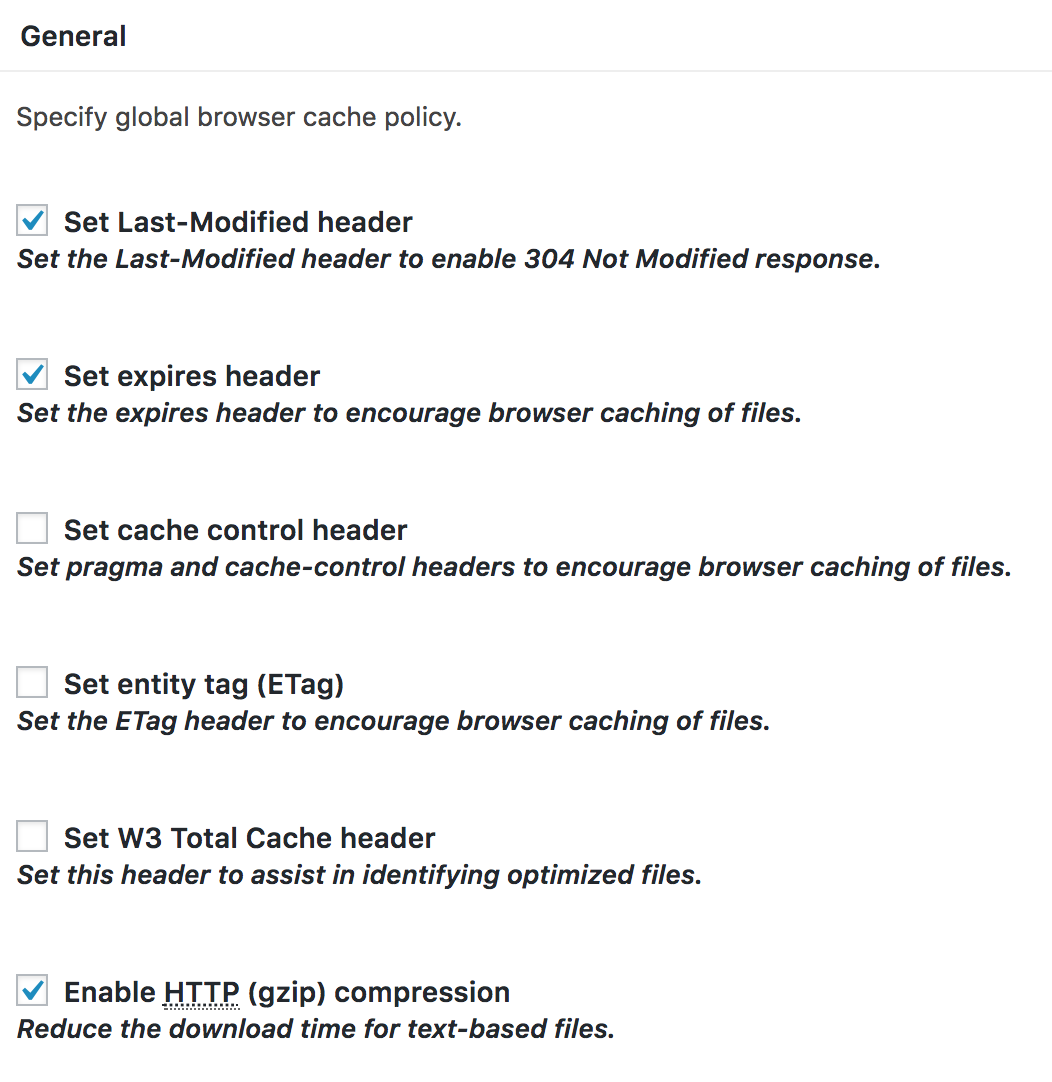
- Important Using a cache plugin when AMP is enabled isn't optional. Using AMP without a cache plugin will not provide the speed benefits AMP offers and will only hurt your performance. Please refer to our performance guide and setup a cache plugin.
Failed Validation
If the validation fails, go through the following troubleshooting steps:
- Go to Plugins and temporarily deactivate all plugins other than these: Bunyad AMP, Sphere Core, ContentBerg Core, WPBakery.
- Since cache will interfere with the process, make sure to disable any cache plugin or webhost provided cache feature (or empty cache on each attempt).
- Try the validation again. If it succeeds, start enabling your plugins again until you find the offender.
- Any code you have pasted into a Widget, or inserted via some other means can also cause conflict. Try to find and temporarily remove such code(s) and try again.
Once you have identified a problem plugin, you will either have to find an alternative or contact the developer of the plugin. Unfortunately, in some cases, it's simply not possible for plugins to be AMP compatible due to limitations imposed by AMP technology (such as no Javascript allowed).
ContentBerg comes with .po/.pot file included under the contentberg/languages folder. To translate:
- Download and install Poedit.
- Open contentberg.pot in Poedit. Translate as needed. Note the backend strings have a context [Admin] - so ignore those if you wish to skip backend translations.
- Save the file with the ISO language code locale. You can check this list (look under "WP Locale") to find the locale. If your locale is
en_GB In this case, you would save your file as en_GB.po
- Step above should have generated a .po and an .mo file. Copy both these files under the wp-content/themes/contentberg/languages folder.
- Go to Settings > General and select your language next to Site Language.
- Save a backup of these files somewhere safe. If you upgrade the theme from WordPress admin, the language files will have to be re-uploaded.
Disclaimer: This section is not legal advice. While we have made sure it's correct in general manner, each blog and business is unique. Please seek your own legal advice to be sure.
What is GDPR?
GDPR is a new Data Protection Regulation law that applies to EU citizens, going into effect on 25th May, 2018. It gives EU citizens rights over their data and it sets rules for how and when you can collect personal information from your EU visitors and users.
Data such as IP addresses, email, names all fall under the category of personal data. To collect this data you either need consent (an action by the user like a click on checkbox or button), or a lawful basis (e.g. network security). It applies to you if you EU visitors or presence.
You can learn more about GDPR here: https://ec.europa.eu/justice/smedataprotect/index_en.htm
What GDPR asks of you:
- Tell the users who you are, why you collect the data, for how long and who receives it. (Right of information)
- Let users access their data, and take it with them. (Right to Access)
- Let users delete their data. (Right to be Forgotten)
- Breach Notification: Let users know if data breaches occur.
- Get a clear consent, before collecting any data.
What you need to do:
All of this is available with WordPress v4.9.6 (update now!) which have tools to create a privacy page (#1), export personal data (#2) and erase personal data (#3). For #4, you just have to notify your users via any communication channel you have, in
case of a site hack or data breach.
You will have to review your third-party plugins to see if they're collecting any personal data that may require consent or a privacy page mention. You will also have to review third-party widgets you may have embedded.
Note The plugins included with ContentBerg theme do not collect any personal data.
1. Create a Privacy Policy Page
WordPress v4.9.6 includes the tools to create your privacy page.
- Go to Settings > Privacy. Click check out our guide to see samples and info for privacy page. Copy sections you may want to use.
- Click Create New Page and that's all.
You may want to link this privacy page in one of your site navigation menus. Also make sure you have mentioned an email address or a contact form to contact you from for users to Request Access to their data or exercise their Right to be Forgotten.
If you include YouTube videos, Instagram Embeds, SoundCloud or Tweets in your posts, you will also have to mention that third-party social media sites are used which may set cookies.
While we recommend the manual route as it makes everything specific to your site, alternatively, you may use a service like iubenda (has a free plan) which makes it very easy to create a privacy policy with pre-made
defaults. It also includes a pre-written Google Analytics policy you can use.
2. Newsletter & MailChimp
For newsletter, first thing you have to do is identify if you have what's called an unbundled or single-intent form.
a) You will use email address just to send newsletter:
You have to do nothing here. Since the subscribe box says Newsletter - the form is unbundled and has the single intention of subscribing the user to a newsletter. Clicking Subscribe button here is consent to receive newsletter.
One thing to keep in mind, you still have to mention that you use MailChimp for your newsletter with a link to their privacy policy, in your privacy policy page.
It's still a good practice to include a small message on what you will use this email for. And always use double opt-in.
Now this becomes a bundled form. The user didn't consent to anything other than a newsletter.
Note You may still be able embed special offers if they're part of your newsletter emails (do mention in advance) but won't be able to send separate promotional emails.
So what should you do here? You need consent for each activity, with checkboxes that can't be pre-ticked under GDPR law. You also have to add additional messages explaining your marketing activities. Unfortunately, including that on multiple widgets on the website will be distracting and make the site look ugly.
The good news is, we have a unique solution that shows a popup for consent and integrates with any existing mailchimp form or widget:
This plugin will let you add a consent popup for your MailChimp forms without affecting your site design. First install it:
- Go to ContentBerg > Install Plugins.
- Install and Activate the Easy GDPR Consent Forms - MailChimp plugin (if it's not shown, it's already installed).
Next you have to configure it for your widgets. Here's a video with text instructions below:
- Open a new tab and login to your MailChimp account.
- Go to MailChimp > Lists. Click on your list you are currently using.
- Click Manage Contacts > Groups > Create Groups.
- The default setting should be selected as a checkbox. Enter Group Category: Consent. Under Group Names, enter the consent you would need, such as Special Offers and Advertising.
- Click Save.
- Next, click Signup Forms and choose Embedded Form.
- Select and copy the code presented on this page.
- Now go to your WordPress Dashboard. Go to GDPR Consent Forms > Add New
- Enter any name for the widget.
- Paste the code you copied in Step 7 to the Form Code text box and click Detect
- Configure rest of fields as you see fit and save the form. You probably want to configure the checkboxes labels to be proper sentences.
- (Optional) If you have any cache plugin active, clear the caches.
- (Optional) These checkboxes may be shown in your live form and if you use these forms elsewhere, you may not want that. You can hide them by editing your form (instructions here).
What's next?
With everything configured, you can now segment your newsletter list by those who did give consent and those who did not. These checkboxes (called "Interest Groups" at Mailchimp) will help you segment users based on whether they gave a particular consent or not. You can learn more about how to create segments at MailChimp KB.
When using a Contact Form, collect only the needed info and make user aware how it will be used. Normally, on a Contact Form, Name and Email may be covered under lawful basis - as long as you delete this info after it's no longer needed and mention it
in your privacy policy.
What if it's not single intent? If you're asking for more information than necessary or if you're going to keep this data around for longer than needed, or if you wish to use it for other purposes like Marketing or subscribing them to
a Newsletter, you need a consent checkbox.
Contact Form 7 supports acceptance checkboxes. Remember to create a unticked checkbox for each type of activity. For example, if it's for Newsletter and Marketing, you will need two
checkboxes.
4. Google Fonts
Our themes make use of Google Fonts. While it's generally not an issue to use Google Fonts, there are some from Netherlands and Germany that are concerned with Google Font's server compliance. While most EU lawyers consider it a non-issue, there's still
some disagreement. Regardless, you have to mention this in your Privacy Policy.
Do note that there are several advantages of using them such as:
- Speed via Cache: Billions of sites use Google Fonts so most of the fonts are already cached in your visitor's browser.
- Speed via CDN: Google has one of the best networks in the world so they serve the fonts from the nearest datacenter. CloudFlare is an alternative for self-hosted.
However if your legal counsel has determined Google Fonts shouldn't be used, we have a solution to self-host them automatically so they're served from your server locally:
Self-Hosted Google Fonts
- Go to ContentBerg > Install Plugins.
- Install and Activate the Self-Hosted Google Fonts plugin (if it's not shown, it's already installed).
- Go to Settings > Self-Hosted Google Fonts. Set Enable Processing to Yes and Save.
- If you have any cache plugin installed, empty the caches.
5. Google Analytics
If you use Google Analytics, you will need to take some steps to be compliant.
- IP Anonymization: You can use a plugin that has *IP Anonymization feature like this plugin.
- Add a cookie notice plugin to inform users about cookie usage. We recommend cookie notice plugin.
- Remember to have a section on Google Analytics with a link to their official Privacy Policy, and the fact that cookies will be used.
- Review data retention at Google
Notice: If you use Google Analytics for personalized advertising (most of the bloggers don't), you will likely need consent before Google Analytics is even loaded (info here).
6. Cookie Notices
A cookie notice has been necessary ever since ePrivacy Directive in the EU for years. But with GDPR, it's no more optional. You are required to mention if any cookies are going to be set by you or a 3rd party in your Privacy Policy.
Consider cookies from these categories:
- Functional cookies required for an important function of the website or app, such as login, security etc. These require no notice and you can just mention them in Privacy police.
- Preference & Statistics cookies related to user settings and 3rd party Web Analytics. These require a cookie notice.
- Tracking cookies or cookies with personal data, set to track user for marketing or to show personalize ads and so on. This category requires cookie notice and consent.
For a blogger using no 3rd party Analytics service and no third party embeds, no action is needed.
Adding A Cookie Notice
If you determined that you need a cookie notice, for example because you use Google Analytics, here are the plugins we recommend:
About Notice and Consent Category (#3):
It unusual for bloggers but some of you may install web beacons or pixels from services like Facebook Ads to show personalized ads to the users. As explained in #3, these may require notice and consent.
What this is means is the user must accept (click a button or a checkbox) before you can load these pixels/beacons or set any tracking cookies for marketing.
Fortunately, Cookie Notice plugin has a solution to block scripts before user accepts it.
Learn More at ICO's Guide (UK official), or iubenda's guide.
If you are looking for layout customizations beyond the Style & Typography settings built into the theme,
it's important to judge the nature of customization.
If it's a simple layout change, it's very likely achievable by using Custom CSS. However, for something not possible using either of these, a child theme is recommended.
Child Theme
WPBeginner has a great article on How to create a
WordPress Child Theme. Use Template: contentberg instead of twentyeleven.
Also, use @import url("../contentberg/style.css"); in the CSS file to import parent stylesheet.
-
Full posts are being displayed on the homepage in large posts. How to show a few lines excerpt?
(a) Using more tag
A native feature of WordPress blogs is called the more tag (also called a teaser). This allows you to create an excerpt. The lines before the <!--more--> tag in a post are used as an excerpt. The advantage of using this method over an automatic excerpt is that it preserves line breaks and formatting such as bold italics and so on. It's the recommended method for large posts.
» Learn about more tag.
(b) Automatic excerpts
Another way is to use the automatic excerpts feature. Here's how to enable them:
- Go to Appearance > Customize > Posts & Listings > Post Listings.
- Set the Post Body setting to Excerpts.
- Save.
How do I create a Mosaic, Squares, or Circle Images Gallery?
- Install Jetpack plugin.
- Activate the Tiled Galleries extension from JetPack > Settings. Don't worry, you can disable all the other settings/modules of Jetpack so it will stay light-weight.
Add a gallery to your post. While adding the gallery, next to Type setting, select Tiles for Mosaic. Example:

- Make sure to set post format to Standard (default). Do NOT use Gallery format - it is used for adding a gallery slider.
My images do not have the right size.
If you already had images when you activated the theme, you will have to refer again to the installation section and run Regenerate Thumbnails plugin.
» Refer to Regenerate Thumbnails
How do I enable Masonry layout?
Masonry layout is supported when you're using a layout that has posts in grid format. To enable it:
- Go to Appearane > Customize > Posts & Listings > Post Listings.
- Tick Masonry Grid Posts.
- Save.
I don't want my images to be cropped.
It's possible to prevent image cropping in some areas, such as large posts and single posts. Image cropping cannot be prevented on any overlay layouts.
- Go to Appearane > Customize > Posts & Listings > General Post Settings.
- Uncheck Cropped Featured Images?.
- Save.